Friday, October 22, 2010

Friends on Friday...You Had Me At Bonjour

I haven't had a Friends on Friday post in a long while. In the past, on Fridays, I've shared a wonderful new blog I've found, a friend's project or a beautiful photo. Well, today I am sharing all of that and more in just one blog. Welcome to...

This unbelievable blog belongs to Kirsty. She is an Australian, living in the south of France and is sharing a bit of her beautiful life with us through her blog. With her permission, I have taken some photos from her blog. You will be transported to France in a heart beat. Seriously...her photos should be in a magazine. Better yet, maybe I should go visit her and see for myself how beautiful the south of France really is LOL !! Pour yourself a cup of tea and enjoy...

This first picture is the view on her walk home.


This is a picture of her childrens' playhouse in the back yard...it's like a fairy tale.


These vineyards are just a short walk from her home...


Just perfect!


and these are from her yard...cherries


figs...


made into fig jam.


and this is her lunch...Oh Kirsty, I think my plane to France leaves in an hour and it's only a 6 hour flight!


space
The bakery in her village...


space
from the bakery to this...yum!

space
Ok, I would die if I lived there...look at this. I'm speechless!
space
Just look at this is lavender in her yard.


The next few photos are from weekend trips in France. The colors are breath taking.


and by the way...she's crafty as all heck!
space
This is a quilt she made for her brand new nephew.


This is her cathedral quilt she's working on...


A beautiful pillow she made.


Look at this detail. I would never use it, it's so pretty.


and this is adorable.


This was a plain paper lantern turned into a cutie...I might also mention this was her first time using a glue gun. What??? First time...I bet she hasn't put it down yet. Those little things are priceless!


I just love finding a new blog and most importantly...a new friend. So hop on over to You Had Me At Bonjour and click that follow button. You will not be disappointed.

Thanks Kirsty, for allowing me to use your photos...I think I took too many, but I couldn't help myself.

Take care,
~Karen~

Thursday, October 21, 2010

Blog Buddy...Poll

I have a quick blog poll for you...leave all your answers in the comments section. A great big THANK YOU in advance!!

  1. Do you have the word verification feature on your comment section?
  2. If you DO NOT have word verification...do you get a lot of Spam in your email?
  3. When you are leaving a comment on some one's blog, would you rather not do the word verification?


Thanks everyone and if you are new to the Blog Buddy feature...click the link or on my side bar for more info.
space
Have a great day,
~Karen~

Wednesday, October 20, 2010

Blog Buddy...How To Add A Comment Greeting

Welcome to another installment of Blog Buddy. I want to thank everyone for all your wonderful comments and emails. I have read each and every one and I'm making a list of your requests. I'm trying to get back to you and your comments, but with the replying to the comments for my Tool Time, I'm a little behind. Thanks for making the Blog Buddy feature a big success...it's my new addiction to keep the ideas coming.


Here is today's tip and tutorial...how to add a greeting above your comment box.


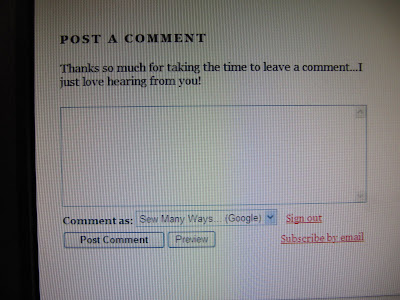
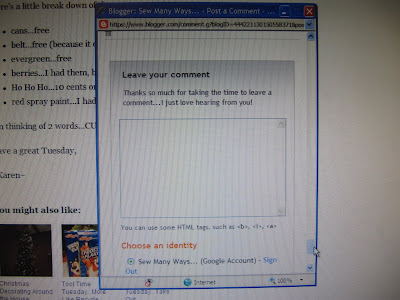
There are 3 ways to have a comment box appear on your blog (instructions for each in a moment) This picture below is how I have my comment box set up. Embedded below post. My actual comment box is the picture above. Embedded below the post means, when someone clicks to post a comment, the whole post comes up, the previous comments before yours and the comment box.


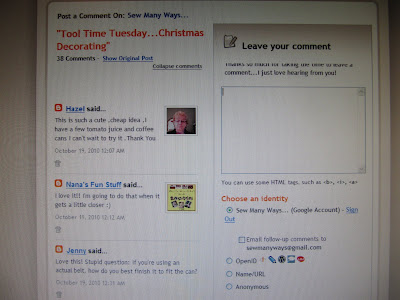
Another option is "Full Page"...which is pictured below. The Previous comments are to the left and the comment box is to the right. If you do want to read the post before commenting, click the blue link called "Show Original Post" just under the title.


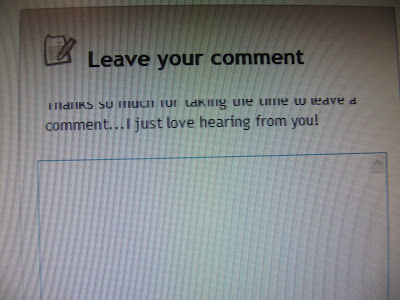
The problem I've seen on other blogs and my own when I had the Full Page option is the print of the greeting is partially cut off on the top. See it in the picture below in the first sentence?


The third option is the pop up window. This is fine, but if some people are using a browser with security features that block pop ups, this window may not appear for some commenters.


Now that you know the types of Comment windows, let me show you how to get there to change it and add a greeting.

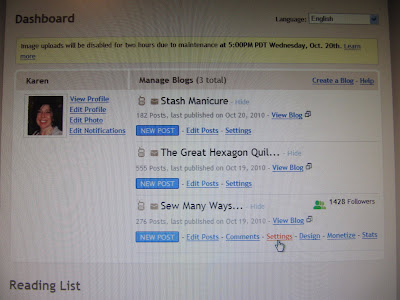
Go to your DASHBOARD...


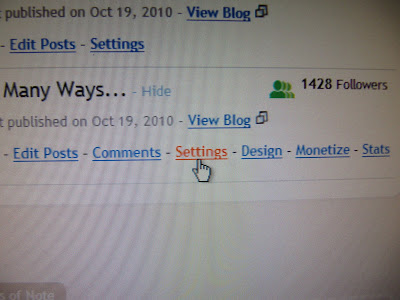
Click SETTINGS.


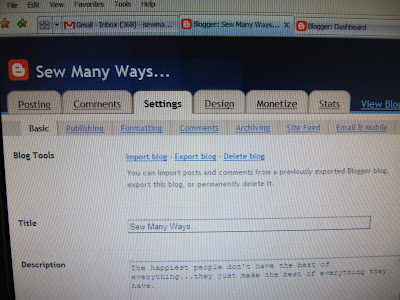
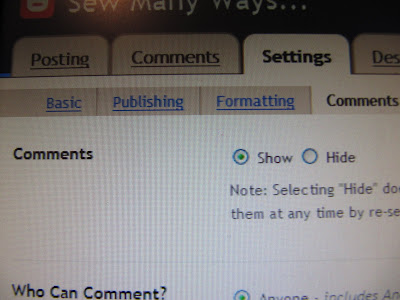
From this page you can change so many different features in BASIC, PUBLISHING, FORMATTING, COMMENTS, ARCHIVES ETC...


For us today, we will be clicking on the COMMENTS section.


I'll run through each step...

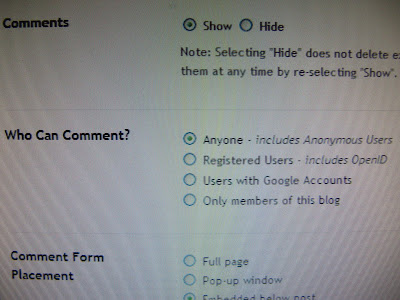
COMMENTS...you will pick whether you want to SHOW or HIDE your comment section. There may be a time where you want to share posts, but aren't up to receiving comments...then you would click HIDE.


WHO CAN COMMENT?... I click "Anyone", because I really haven't had any problems with Spam or bad commenters. If you have "Google Accounts" only, you may be missing out on a lot of great people leaving comments. "Members Only" is for maybe a family blog where you only want certain people to access your blog.


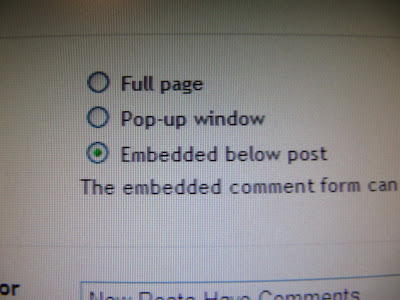
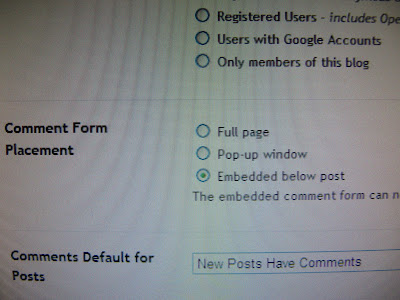
COMMENT FORM PLACEMENT...I described that earlier. This is how the comment window appears.


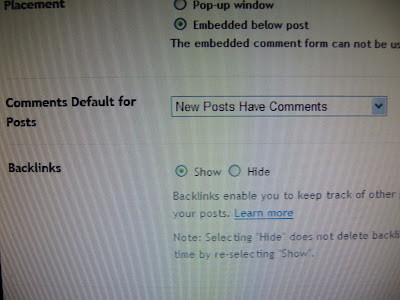
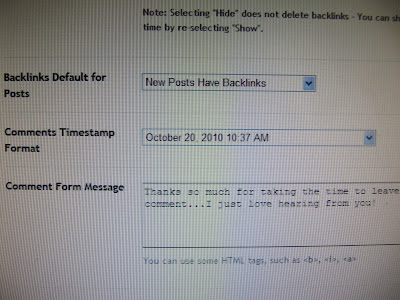
COMMENTS DEFAULT FOR POST...you would just click "they have" or "they don't".
BACKLINKS...I have "SHOW" backlinks. A backlink just means a Blogger blog linked to your post in another published post.


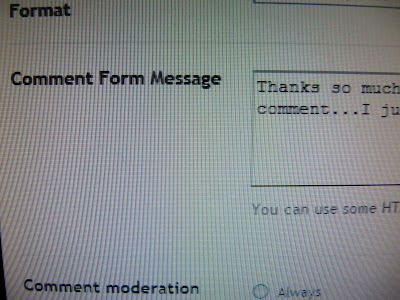
The next are just BACKLINKS DEFAULT and the way you want your DATE and TIME to appear below the post. And now the most important part is the box for COMMENT FORM MESSAGE...in other words, the box where you type your comment greeting.


Just click in that box and type away...


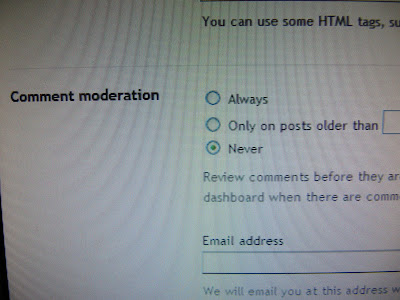
The next section is COMMENT MODERATION. I have NEVER clicked on mine, but if you click Always...you can read your comments first before they are place on your blog. It's just like a PREVIEW section. That's why sometimes after you leave a comment, it doesn't appear in the comment section right away. Look to the top of the comment section on someone's blog they might have that feature enabled...you will see COMMENT MODERATION.


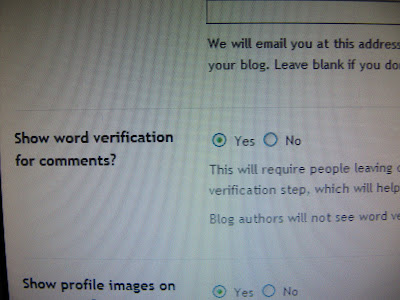
SHOW WORD VERIFICATION... I put yes, this prevents SPAM. A person has to type in that jumbled word. If it's a computer trying to spam you, that automatic computer can't type in that word to send spam your way.


The last 2 settings are SHOW PROFILE IMAGE...that's the picture you've chosen to be next to your profile on your dashboard. That image will show up next to each of your comments. There's also a pop up window that appears when you leave a comment. It says..."Do you want to display non secured items?" If you say yes, your pictures will show up. If you say no blank boxes will appear.

The last section is COMMENT NOTIFICATION EMAIL...enter all of your email addresses that you want your comments sent to.


and last, but certainly not the least....CLICK THE SAVE BUTTON. You know the drill by now LOL.!!


Have fun changing your settings and I'll be back with more later on!

Have a great day,
~Karen~

Monday, October 18, 2010

Tool Time Tuesday...Santa Claus Can

Hello and welcome to Tool Time Tuesday. For the next few weeks or more, I am going to gear these TTT posts towards Christmas...maybe do some decorating posts or maybe gift giving ideas. I know it may seem early, but we all know those nights of making or decorating at the last minute. So why don't you join me in doing one or two crafts a week, so you can actually enjoy the holidays without all the rushing around.

Here is the first project for the holidays....A Santa Can. Make one this week for yourself and then make another one for gift giving. It's perfect and practically FREE!


Do you remember the post I did showing flower arrangements for a school fundraiser. I went to local restaurants and pizza places and asked them for their large metal cans that tomatoes come in. They were happy to give them to me for free. They are the big ones...7 inches high and 6 inches across at the top.

That's one in the picture below. You will also need red spray paint, something to make a black belt and a belt buckle. Pictures on this next...


Here are some ideas for Santa's black belt. Old leather belts that don't fit any more (I don't want to talk about the not fitting part) or elastic belts that you can adjust to fit.


How about an old strap from a camera or bag that you aren't using any more.


You can also cut black fabric and fold the raw edges into the middle...no sewing! You can also use trim, satin ribbon or ric rac too.


If you aren't using an actual belt, you'll need a buckle. You can cut one off an old belt or use 2 D rings. D rings are the things you find on a belt most of the time made with ribbon or a scarf. Another idea to make a shiny belt buckle is to cut open a soda can, trace a template of a buckle on the inside metal and cut it out with tin snips. Actually, the can is so soft, I cut it with a small pair of scissors.


Just find a picture of a buckle and draw it out on card board.


Then trace it on the inside of the can.


The next step is to spray the can. I sprayed it upside down so the paint won't get inside the can.


Now for the ideas...
a place to hold all the Christmas cards you receive over the holidays.

Add some evergreens cut fresh from outside for the scent of the holidays.


Add some berries for a beautiful centerpiece. These were some fake berries I already had, but real ones from your yard would be beautiful too.


Then add a little HO HO HO sign for the perfect greeting at your front door. I bought this sign after Christmas for 10 cents. You can easily make one by printing the words out on your computer, tracing it on cardboard...a little paint and glitter and you're done!


These large cans would be great for centerpieces, but wouldn't a little vegetable can or those tiny tomato paste cans be cute decorated the same way, but used for place card holders at the dinner table. Ohh, I need to make one of those!! I'll show you if I do! Add that to the list of "To Do's"


Here's a little break down of the cost:
  • cans...free
  • belt...free (because it doesn't fit...wahhh!)
  • evergreen...free
  • berries...I had them, but maybe $2.00 if you had to buy a bunch)
  • Ho Ho Ho...10 cents or free if you make one
  • red spray paint...I had it, but $3.00 for the can if you need to buy it
I'm thinking of 2 words...CUTE and CHEAP!
Have a great Tuesday,
~Karen~
I am linking this to The Idea Room, Funky Junk Interiors and C.R.A.F.T. MMM and Under The Table and Dreaming parties...come join the fun

Wisata Danau Toba - Sumatera Utara

Danau Toba adalah salah satu destinasi wisata alam terbesar di Indonesia dan terletak di Sumatera Utara. Ini adalah danau vulkanik terbesar ...