Showing posts with label crafting. Show all posts

Monday, February 6, 2012

Tool Time Tuesday...Ideas For Shoe Organizers

Pin It

I haven't had an organizing post in a little while, so I poked around the house for something I haven't shared yet...so today it's shoe organizers!! We do use them for shoes, but we also use them for other things too. This is a short post of a few ideas that might be helpful in your home.

Here's one of two over the door hanging shoe organizers in Kelsie's room. Most all her shoes are with her at school, so I played around with some ideas to inspire you.

Shoes of course...


How about scarves, gloves, mittens, hats, belts and other accessories.


One pocket for each skein of yarn. Keeps it clean, organized and easy to see.


Toy holder...stuffed animals, barbie dolls, games


This is a small narrow closet in the girls' bathroom.


Holds all the essentials...easy to see when you are running out and need more soap, lotion, toothpaste, floss etc.

I actually cut this in half. The other side is hanging in Courtney's closet. She has a mirror on the inside of her door and this bag fits perfectly without covering the mirror. When you cut it the length of the bag, make sure you keep the seam for each pocket intact.


You could also hang this on the back of your kitchen pantry door. Keep all those small things from getting lost with the cans.


This clear over the door hanger is on the back of my husband's office door. Holds all the over flow office supplies.


These are the shoe bags that hang from the rod in your closet.


Nice and deep front to back.


Ahhh...fabric!!!


Charm packs, fat quarters and yardage all in one place!!


There are so many other things you can store in shoe organizers...
  • cleaners
  • medicine...as long as they are locked and out of reach from children. Great for child free homes
  • canning jars filled with craft supplies (buttons, beads). Each jar fits in the pockets
  • children's snack bars and treats
  • socks, nylons, pantyhose, tights
  • bra organizer...keeps them from getting crushed your drawer
  • dog supplies...toys, stuffed animals, bones, treat, leashes, collars, brushes
  • hair accessories...head bands, clips, bows, brushes, curling irons, straighteners etc
The list is endless what you can store in these bags. They are neat, tidy and out of sight behind the door.

Go through your home and see what you can gathered up and stored in one place. "Like" things stored together keeps things organized and easy to find...which equals less stress!!

Happy organizing,
~Karen~

Monday, January 30, 2012

Tool Time Tuesday...Button Bracelet Tutorial

Pin It

Happy Tuesday! Today is an easy tutorial for a button bracelet. Get your button collection out. If you don't have one, find someone who does and go through it!!

I have a small button collection made up of things from my own projects, from my mother and my grandmother. They were both frugal and both loved yard sales...so I'm not sure where any of these buttons came from. If they had clothes that were no longer wearable, buttons were removed and saved in big glass jars. If they were at a flea market or yard sale and there were buttons...they would buy them.

and this is the result of all that button saving!


A family history on one bracelet...


Here's what you need...


I bought this charm bracelet at Walmart in the craft section for $2.00.


I also had these larger jump rings for the larger buttons. The little ones came with the bracelet, but didn't fit any of the buttons. You will need the larger rings for the width of the button from the holes to the outside. This package was about $2.50 for 60 and the size is 10mm.


You will also need buttons of course! You can buy new buttons in craft stores. Some actually come in group packages of the same color.


I used mostly pearlized buttons in different shades of cream.


First step...open up the large jump ring.


Slip the ring through any hole in the button.


Add to a loop of the bracelet and close the ring.


Plan out the larger base buttons to add them equally across the bracelet.


To make it look fuller without using a ton of rings, add 3 different sized buttons to one ring.


Depending on the thickness of the buttons, you might only fit 2.


Work your way down the bracelet.


This is so cute and you could be finished at this point.


or you can start adding different sizes, shapes and textures.


One pearl bead button and a small flat button.


I also found these clear crystal looking buttons. Can you see the thread still left on one of them? That shirt didn't have a chance. Lol


Look at this bunch someone tied up...so funny.


Added both on the same ring for a little bling!!


I love this picture of the pearl button towards the bottom of the picture. Can you see the shank of the button? It's verdigris. It must be brass or copper and old. I didn't want to clean...there's a story with that button.


Here's a Tool Time from someone out there...either my mom, my grandmother or someone who they bought the buttons from. My mom and grandmother are both looking down on me, so I can't ask, but I'll give credit to both!

They used bobby (hair) pins to hold the buttons.


Slide buttons onto the hair pin...and twist the bottom closed.


I love it!


I hope you had fun in my button box...

Hmmm...I'm thinking earrings too.

Have a great Tuesday,
~Karen~

Monday, December 5, 2011

Tool Time Tuesday...Santa Ornament

Whether you are young or old, we all love Santa Claus. This year I wanted to have a Santa themed tree, but really didn't have anything that looked like Santa and didn't want to spent any money. I did have different ornaments that were red or candy cane color and I just made that new peppermint candy garland last week. Click HERE for that tutorial.

Here is my Santa solution...Tool Time style!!


Here are the items that I used.
  • old red ornaments
  • black electrical tape
  • silver tape used to seal up duct work
  • jumbo chenille stem...or you could use cotton balls or quilt batting


Jumbo chenille was $2.99 at Michael's Craft Store. I made 11 ornaments with this package of 6.5 feet.


This is the foil duct work tape. I stole this roll from my husband's workbench...he'll never get it back now. Lol !!!


Just cut a rectangle. Fold it in half, snip the center square out and then unfold again.


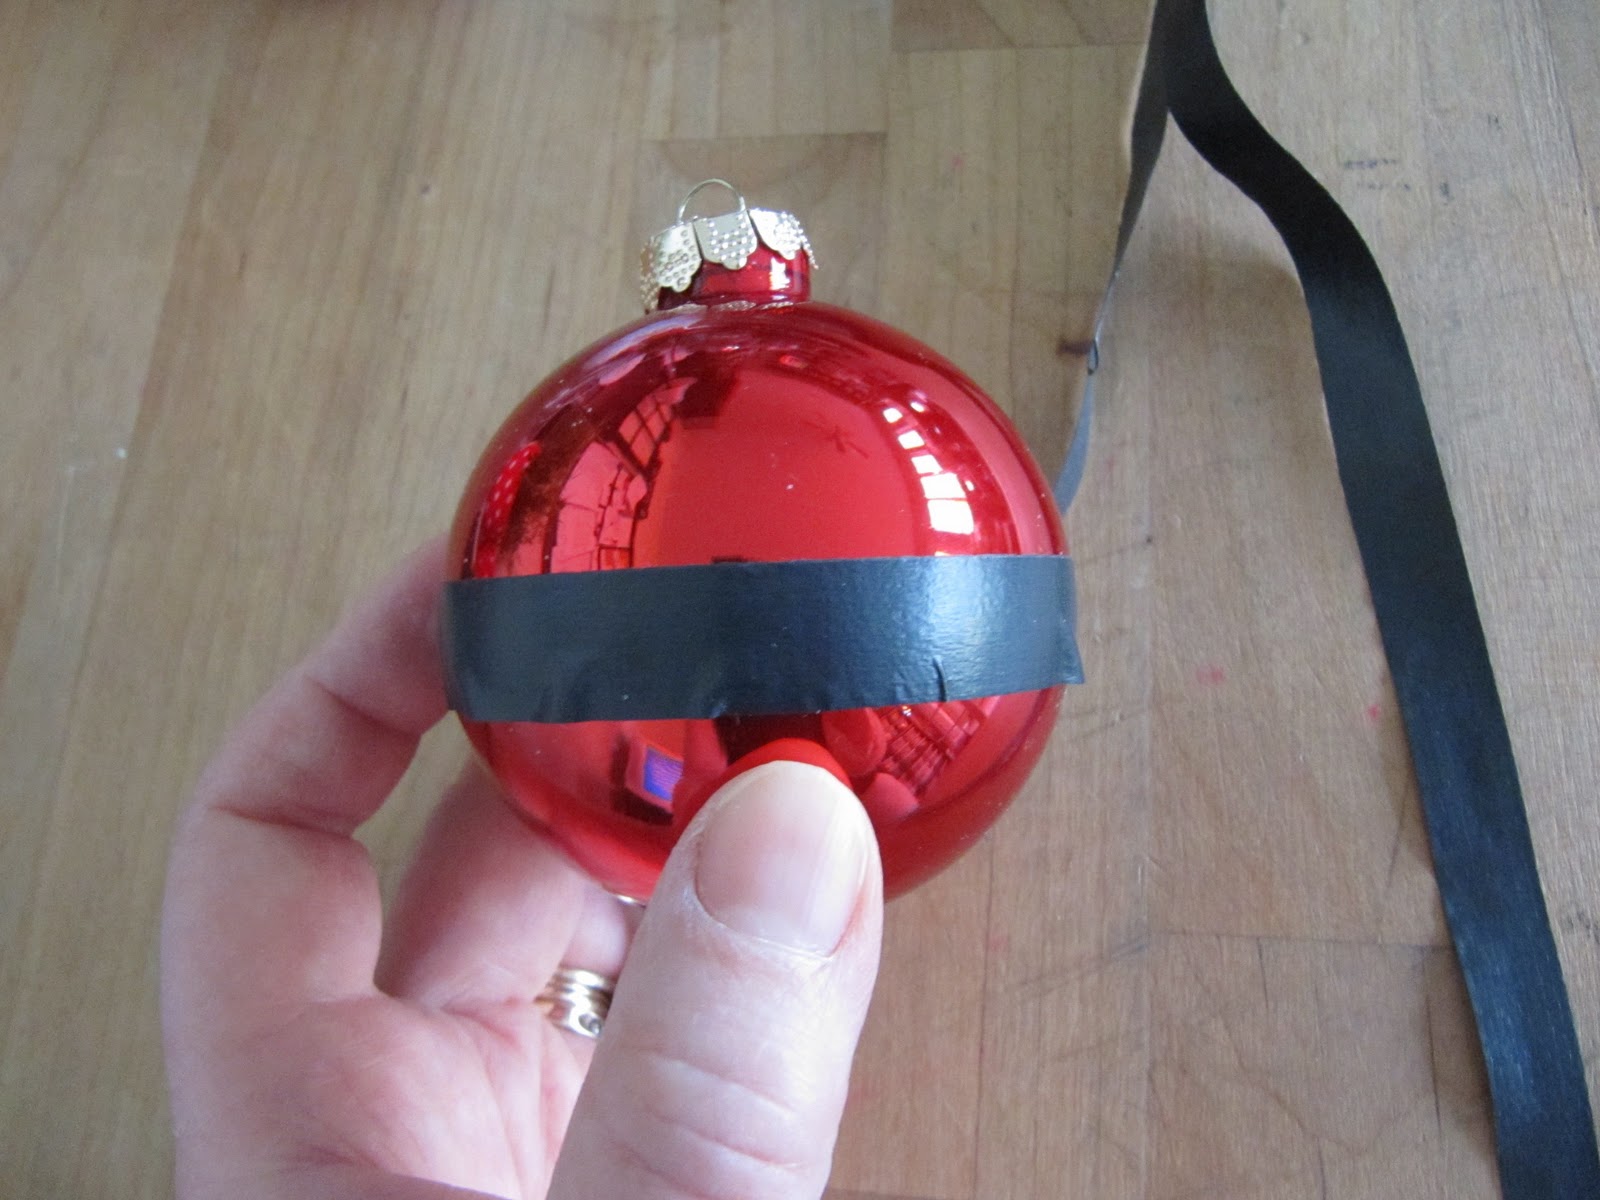
To make Santa's belt, I cut the electrical tape in half length wise


Wrap it around the "belly" of the ornament.


Cut your chenille stem and form a donut. I hot glued the ends to secure and then glued it to the top of the ornament


Now peel the backing off the silver buckle.


and place over the black belt.


The donut hole of the white fur still exposes the ornament hook.


and here it is in all it's Christmas glory!!


I finished the whole Santa tree and I will share that tomorrow. Amazing what you can make with things from around your house when you don't want to spend any money!!


Hope you can add the spirit of Santa to your tree. These would also make great gifts for teachers and friends or add them to packages as a little extra gift.!!

Have a great Tuesday,
~Karen~

Wisata Danau Toba - Sumatera Utara

Danau Toba adalah salah satu destinasi wisata alam terbesar di Indonesia dan terletak di Sumatera Utara. Ini adalah danau vulkanik terbesar ...