Showing posts with label business cards. Show all posts

Monday, May 14, 2012

Tool Time Tuesday...Sewing Soap Dish

Sewing Soap Dish...What?!? You know me, I'll find anything to transform into something else and this time it was in the bathroom section of the hardware store.

I think a better name for it is Armchair Sewing Table...


Here it is in it's original state. It's a soap dish that hooks onto the edge of a bath tub and holds your soap. I'm thinking armchair, but if you do any hand sewing in the tub...this will work great for that too, LOL!!


Here's my thought process...you need a few STRONG magnets...not the crafty ones. They sell strong ones in the hardware store too.


Put the magnets on the bottom of the soap dish. They stick on their own because teh dish is metal


I found some of the strong silver magnets too.


The magnets on the back of the metal dish make the top part magnetic to hold your pins and needles in place!


If that doesn't work for your soap dish, use my ever popular magnetic business cards. You know I use these a lot. Click HERE for other projects using these magnets
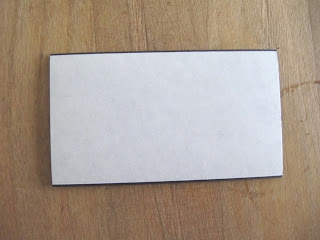

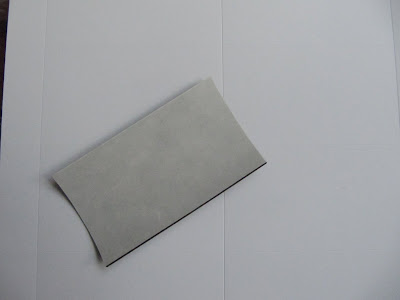
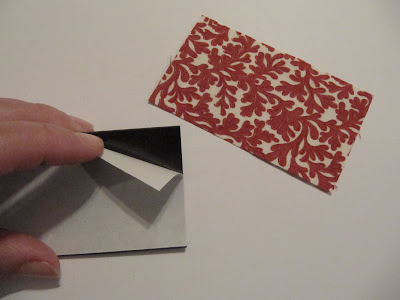
The magnetic business cards have a sticky side...


and a magnetic side.


Peel and stick it to the top of the soap dish.


Now it holds your pins and needles too.


Now onto more fun with this idea. These clips are name badge reels. They hold a name badge and they also pull out with a string like a tape measure.


I found these in the office supply section of Walmart...4 for $1.88.


Clip the reel to the handle of the soap dish.


Open up the name badge holder that has a snap closure and add your little scissors.
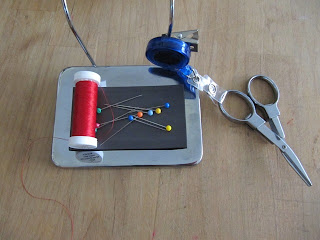

Now you can pull the reel to clip your threads, but never lose your scissors in the chair.


Ok, here's where the demise of this idea came for me :(

See that arm of the couch off to the left...that's where this adorable soap dish WAS going to fit. WAS is the operative word here. The couch is fairly new and I forgot that the little brown pillow is "attached" to the arm of the couch, so my little sewing helper doesn't fit here.


Works on the pillow though. I will find a place for this...seems like the armchairs in my house are a little too big.


Still wanted to share the idea though, just in case the soap dish, armchair sewing table, thinga ma bob might work for you.

It is great to have all your sewing needs in one place when you are doing your hand sewing and you'll never lose them in the couch!!

Happy Sewing,
~Karen~

Pin It

Monday, April 2, 2012

Tool Time Tuesday...Magnetic Business Card To Bookmark

Happy Tuesday everyone!! You all know Tuesday's projects can use just about anything from anywhere. Well, today is no exception. You know those magnetic business cards you receive in the mail or from businesses around your town...we're recycling those into this cute bookmark!!


All you need is...
  • one square of fabric 5" x 5". Great for charm packs. You can also use left over jelly roll fabric
  • one magnetic business card
  • sewing machine


If you don't have any magnetic business cards, you can buy a box of them in office supply stores or online.


They are sticky on one side to attach your business cards to. We won't be using the stick feature today, but you could use it as a short cut with just ribbon and no sewing.


I'm cutting the magnet in half, but you could use 2 whole ones. Just adjust your fabric needs for that.


Cuts easily with scissors.


To start, fold the 5 inch square in half, right sides together.


Pin. Lay magnets on top just to make sure they fit on your fabric.

Make sure there is about 1/4 inch of space between the 2 magnets and enough seam allowance all the way around.


 Sew with 1/4 inch seam on the 3 sides, not the fold. Turn and pivot at the corners.


Leave opening big enough for magnets to fit.


Turn right side out.


Poke out corners.


Iron flat and then insert first magnet piece. Push to the top.


Add the second magnet. ****Make sure you have the magnets going in with the same side up so they attract to each other.****


Whip stitch or machine stitch the opening closed.


Fold in half and pin to find the center.


Push the magnets to either side to give you stitching room in the center.


Sew down the middle. Keeps each magnet on each side.


All Done!! Clip the magnet over the page. Grabs onto the other magnet through the paper.


Make sure you have the magnets facing the same way though!


Great little gift...


I know with the popularity of electronic books, bookmarks are becoming extinct (Lol), but this is perfect for...
  • book club friends
  • quilting bee friends for quilt book and magazines...make the fabric match a gift basket you give them with sewing goodies.
  • people who love to cook...for their cookbooks
  • great teacher's gift
  • religious groups for bible study

I'm sure there are so many more great ideas to give this quick and easy project...

Happy sewing,
~Karen~

Pin It

Monday, October 4, 2010

Tool Time Tuesday...Magnetic Business Card Ideas

This Tuesday finds us back at Home Depot again. I think I'm there more than the fabric store!! I found these magnetic business cards in the key making section. I'm sure all hardware stores sell them. Carpenters, plumbers, electricians would use them to adhere their business cards to and then they become advertising magnets for the refrigerator. They also sell them in office supply stores, but I've said it a hundred times before...things are cheaper in the hardware store, because they don't know what they have. If they knew crafters and quilters were in there, they would raise the prices. Shhhh...don't tell them.


This box of 50 was only $10.00. They are much more in other stores. They could be cheaper online, so shop around. All you do is peel away the paper and stick on your business card, maybe from your blog or etsy shop. However, you know me...I'll think of something else.


You can really just use regular paper or card stock with your own design, but I thought I would show you the world of packaged business cards for your printer. I might do another whole post just on the uses of business cards (because I have a lot), but these instructions are for printing for the magnets.

Business cards come in many different styles and colors.


White, cream...


and many, many more!


Here are a few close-ups.


If you use business cards for the computer, all you do is print, peel and stick.


Here is a quick tutorial for using Microsoft Word. Click on it from your desktop.


Once Microsoft Word opens, click on MAILINGS at the top.


Then click on LABELS at the left.


A pop up window appears that looks like this. At the bottom middle is an OPTIONS button.


Click OPTIONS.


Find out from your package of business cards what your template number is. This one is Avery 8371.


In that OPTIONS window, you will scroll down to find your template number.


Click OK...


At the next window, click NEW DOCUMENT, down there at the bottom.


The template that matches your business cards will appear.


Just type and print. There are a few adjustments if it's your first time....like centering, size of fonts etc. So when you are ready to print something, print on plain piece of paper then hold it up to the blank sheet of business cards to make sure the print is where you want it. Then print on the business card sheet.


Print away. Try to use the whole sheet, so you don't waste any cards like I did here.


Here's a close-up.


Separate on the perforations...


Peel paper away from front side of magnet.


and stick the card on.


Here it is on my magnetic memo board in my sewing room...see it on the bottom left. Right where I can always see it! The tutorial for the memo board can be found HERE. There is also a tutorial for those take out container on the bottom right HERE. I use those to store tiny things.


How about a fabric magnet to match your kitchen or craft room. The magnets are 2" x 3 1/2". Easy and great gifts too.


Too cute!


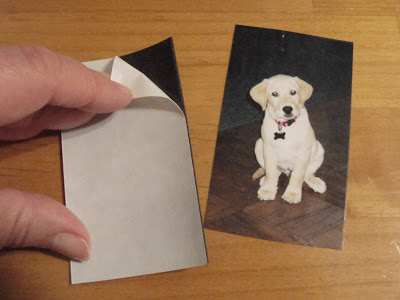
A picture magnet is another great gift idea or just a cute addition to your frig. Here's Annie 10 years ago.


Trying to center the picture on the magnet can be tricky, so take a piece of card board and trace your magnet.


Cut out the center of the card board.


Now you have the perfect "window" to trace around your picture.


Cut out along the pencil line.


Peel and stick.


and here's Annie, as a puppy, on the refrigerator.


The cutest magnet to hold up her reminder card for her vet appointment.


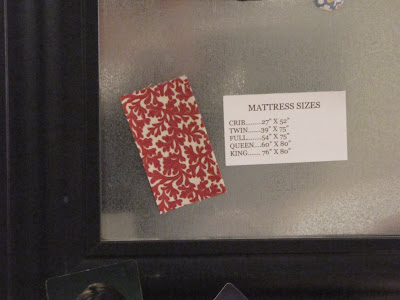
There are so many other uses for these magnetic cards.

How about all those important phone numbers.
  • great for the baby sitter
  • emergency numbers for your child to have with a quick look at it on the frig at his/her eye level
  • important numbers for your school aged child and it will stick inside their LOCKER!!


A list of all those important dates...a great quick reminder when they are always there at a glance.


How about sending a beautifully designed magnet as a SAVE THE DATE card for a wedding. There are so many beautiful business cards just for weddings, this would be perfect.


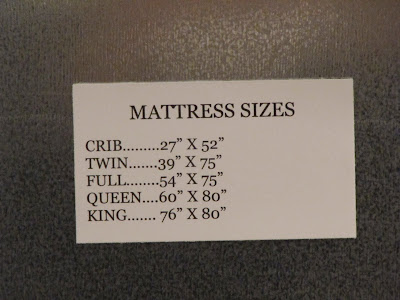
and how about your favorite MEASUREMENT EQUIVALENT CHART. You can design the one you would use the most.


The ideas are limitless for these cards. I have another idea in the works. If I finish it this week, I'll pass it on.

If you have any ideas and want to share, just let us know in your comments.
space
Remember...always think outside the box.
space
Happy Tuesday,
~Karen~

Wisata Danau Toba - Sumatera Utara

Danau Toba adalah salah satu destinasi wisata alam terbesar di Indonesia dan terletak di Sumatera Utara. Ini adalah danau vulkanik terbesar ...