Hello everyone! Welcome to my sewing room. Grab a cup of your favorite something and spend some time with me. I just love when friends drop by! I've done 2 other posts on my sewing room in the past. The first was when I first moved into my room after a very devastating flood in my basement and the second post was after a big clean up.
Well, this post is about a clean up, a few furniture moves and it also includes links to a lot of the projects I've done on my Tool Time Tuesdays posts since the beginning. All words that are printed in red will be links to a tutorial post!!
Remember I am a thrifty person and rarely, if ever, do I spend full price for any thing. I repurpose, paint and use thrift store finds in my sewing room. So if you think you can't have a sewing room or a craft space, just look around your home and I'm sure you'll find things to paint and put together to make a great work area.
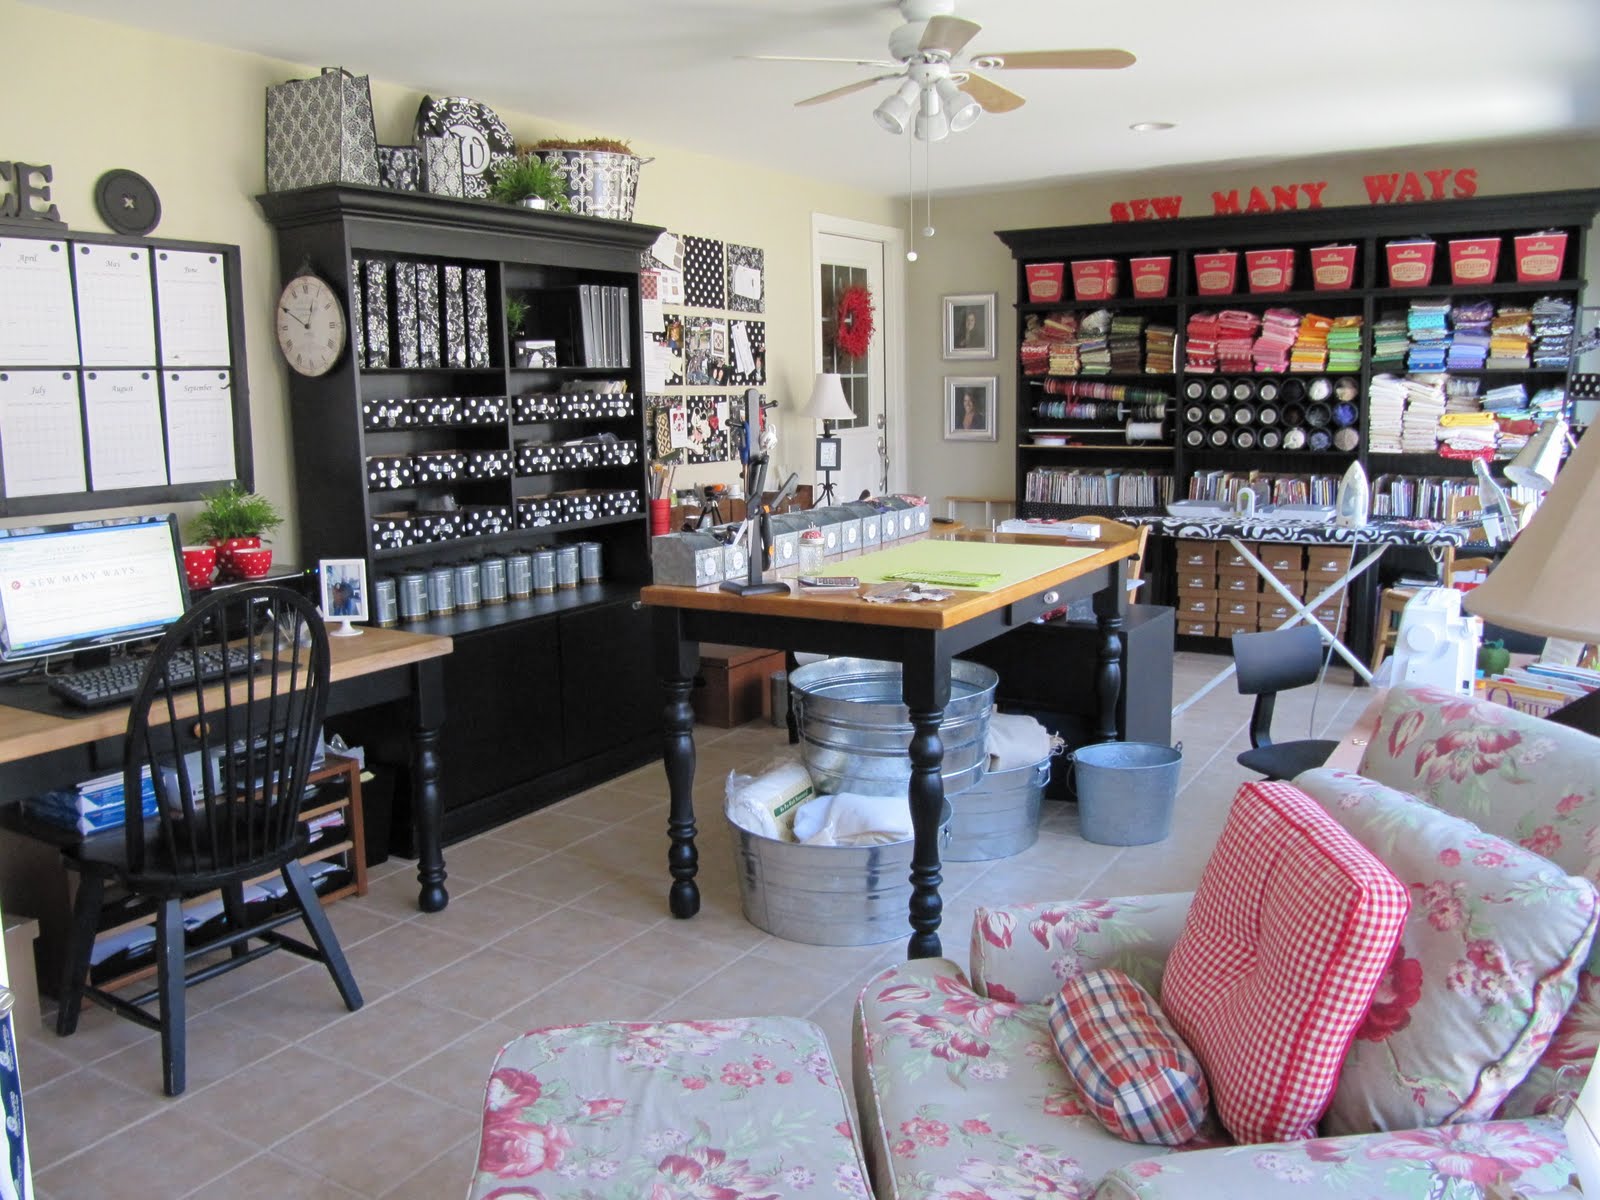
So here is the room all cleaned up and a few tables moved around.
Don't get use to this, because it doesn't stay like this for very long...

Seeing that this is where it came from, I'm sure it won't take me long to go back.

Seriously, it was worse in person.

For some reason, I work well like this!

This frightful picture is in the middle of moving things in and out and changing things around. It definitely gets bad before it gets better when you're moving stuff.

Ok, now we are all back together, let's start in one section of the room and work our way around. This wall holds all my crafting and sewing supplies.
- The boxes are Sterilite plastic shoe boxes from Walmart...98 cents. I have been collecting those for years. I always buy white so they will always match over time. Each one is label in the front.
- The frame with the metal in it is from a thrift store...cheap! The small take out cups hold small beads, screws and office supplies and are stuck up there with magnets. Click here for that post

To the left of that cabinet is my Vertical Coffee Can project. I originally made that for spray paint cans, but now I use it for all my strings. Click here for that.

I hot glued a tape measure on one side to measure out the correct length for a project.

The handle at the top holds the scissors to cut the string.

This chair is so old...over 15 years I think. It's great for my husband or the girls when they come in for a visit or just to sit when I'm do some hand sewing. The small table on the side is also a redo which you can see over at this post.

Here's a little peek under the chair's skirt. You can turn any piece of furniture into a beauty with slip covers.

We got rid of the family office space now that the girls are both in college, so I moved all the house paper work and such to my office in my sewing room. Now I really need to be organized with this desk.

2 old window frames with cork in one and calendars in the other keep all the important info right there in front of me. Here is the post for this project.

Can't forget the jumbo button wall decoration above my desk. That post was so popular. This is made from a cheese board!

A 25 cent thrift store find hangs on one of the legs to hold all my reading glasses!

A file for important papers right where I can find them.

The spike paper holder keeps little notes that I jot down very organized. Here's that tutorial for the spike paper holder.

My grandfather's old ruler and oil can are great picture holders for decoration.

Just twist up a piece of wire and stick it in the oil can to hold your picture.

On the right side of my desk is a double side picture frame. One side is a picture and the other holds all my user names and passwords. See this post for that tutorial.

I have 2 daughters who have grown up way too fast, but I keep their old Slinky's to remind me when they were little. I keep my most important "To Do" notes in there. I miss my girls something awful!

Now going under my desk...every square inch of space is important. This file box holds greeting cards.

These cheapo office boxes are the perfect size for hanging files. Who needs a file cabinet when a cardboard box works just as well.


Still underneath the desk...this is an old TV stand that I added 2 shelves to. The black trays were in a clearance section in Staples office supply. They hold all my different papers for the printer.

Each tray is labeled.


This was a very old china cabinet not being used in the basement. A coat of black paint, glass doors taken off and crown molding added. All the crap up on top...decorative plastic grocery bags, but filled with stuff.

These magazine holders have all the computer and printer information and instructions. The magazine holders are made from cereal boxes...tutorial here.

The handles for them are Pipe Straps found in the electrical section of the hardware store.

3 ring binders hold all my patterns and inspiration pictures.

This binder is filled with those plastic sheet protectors.

All the pages neatly protected and you can easily see all your patterns or important papers.

Each pattern just loads in from the top. See here for a guest post that I did with a lot more tips.

These boxes hold so much too. These boxes are Propel water boxes. I just glued strips of fabric on the outside of the box and used the pipe straps again for the handles.

Holds tape and so many other office and craft supplies.

Hang tags dangle from a key ring.

Next section of the room is my crafting table.
- cork squares with fabric hot glued onto them are mounted on the wall with 3M adhesive strips
- hot glue guns are resting on a silicone mat for easy clean up...click here
- glue gun plugs into surge bar with lamp attached. If the lamp is on...that is your signal that you left your hot glue gun on!...click here for that.

Old wooden boxes are label with a galvanized Light Switch plate. Just screw it into the box for a cute label plate.


An old thrift store find is now my tool box.

This wall unit is 3 old cheapo laminate book shelves, painted, thin paneling removed and bead board added to the back for support and crown molding added to the top.
Seriously...crown molding and paint can turn junk into a jewel.

These are just tension rods in one of the shelf sections. All my ribbon is stored here. Easy peasy! There is a yard stick attached to the shelf and scissors tied on with a ribbon, so they are always there.
There is an update on how I store my fabric. This picture shows them stored in stacks in the wall unit. Due to too much sunlight and fading, I have switched to a new system. Still working on completing all the filing, but CLICK HERE to see my new system!!

This was a popular post too. Remember the French Drains I cut up to store all my canning jars of button and my skeins of yarn...click here for that.

Plastic popcorn buckets are a cute way to store fabric and scraps!

Wooden plate racks can hold quilting rulers or your accu quilt cutters.

Here is my mom's old pot rack. Keeps my old quilt collection and miscellaneous projects close at hand.

Having an electric pot in my sewing room is great too. Boils water in just a few seconds.

Join me for a cup of tea?

This is my sewing table. Very low for me...I'm a shorty at 5' 3" or maybe less now...haven't checked lately!! I made this with 2 old side tables painted black and a hollow core door from Home Depot for $18.00. Click here for that post

This is an old toothbrush holder for my small gadgets next to my machine. The pin holder is from the automotive store. It a magnetic car parts holder, but great for pins.

An old tool box holds all my thread.

Golf tees with flower glued on top will keep the matching bobbin with the right spool of thread. Also don't forget the little hair scrunchy that keeps your bobbin from unwinding.

This stand is from the office supply. Holds paper while you're typing...but for me it holds pattern instructions when I'm sewing.

My sister bought me a bunch of these yard sticks...

I think I might put them on the edge of my sewing table.

Here's a little small desk painted black to match. An extra spot when the girls are in here sewing with me.

This is my cutting table in the center of the room.

The cutting table is elevated higher than the other 2 tables, for ease of cutting...you don't have to bend over as much.

Just add finials to the bottom of your legs. See the white line I added so you can see the extra piece that makes the table higher.
You can also use the plastic bed risers that you can buy in Walmart for $8.00 for a set of 4.

Here is a picture of the only drawer on my cutting table. It holds all my quilting rulers. I'm showing you this for the handle idea. I changed out the knob for a spool of thread...click here for that idea.

On top of the table...I lined up metal boxes and labeled them to hold all the scraps that I cut down to size as I am cutting out a quilt.

Each box holds squares or strips from 1 1/2 inches all the way to 4 1/2 inches. Keeps your scraps organized and you don't have to cut them down later if you do it as you are sewing.

This is an old mug tree (holder) that I now use for my scissors and rotary cutters. Keeps them off the table and not buried under fabric.

Big metal galvanized tubs from the hardware store hold batting and fabric that isn't 100% cotton. When we have family functions, I also use these to hold soda, water and beer bottles.

and lastly...I mounted curtain rods on all three sides of my table. They hold freezer paper, Heat and Bond and other rolls of paper. Easy to cut off, always easy to find and not wrinkled.


Hope you enjoyed the tour. I just love sharing tips and tricks and especially, inexpensive ways to make your space work for you.

Hope you will stop by again and have a cup of tea too,
~Karen~