Sunday, July 11, 2010

Sharing on Sunday #7...Christmas in July

Hope everyone had a wonderful weekend. For those of you who are new to my blog...(I had new followers this weeks!! Thanks to all who clicked the follow button)...I started Sharing on Sunday as a way to thank all of you who visit my blog each day.
space
I may find something on sale, thrifting, may have a duplicate of something at home, something I have made or it could be something I have that I want to share with you. No matter what it is, I want to share, because I'm grateful for the friends I've made through blogging.
space
Since my last post was about wrapping gifts, how about a Christmas wrapping set.


space
First is...2 packages shrink wrap gift bags. Each package has 2 bags in each. You just place your gift basket or gift inside and then tie it up. Now you use a hair dryer to make it shrink around the basket.
space


The bags have a snow flake print.
space

here's the size.


Next is the ribbon to tie up that gift basket. Cute red swirl.


The roll has 9 feet of wired edge ribbon 2 1/2" wide.


Next, you need the hang tag for the basket.


There is also a package of 40 peel and stick gift labels. The front has gold labels...


and the back of the package has silver.


I've also included a package of cupcake wraps and decorative picks with the snow flake theme.


Now how can we have a gift basket without the grass. Ok, they call it basket filler, but basket grass sounds better. It's red and has some shiny pieces mixed in.


I think you're all set to wrap a few gifts this holiday season. Normally, I would just ask you to leave a comment to be enter (which you still can) but if you'd like to share a special or favorite Christmas memory that would be great too. Don't feel like you have to, just a "hello I'm entered" is fine.
space
Happy Christmas in July,
~Karen~
space
ps...I think someone is going to ask where I found all these Christmas things in July. Well, I have a place in the house where I keep all the things I buy during all those after Christmas sales. I just raided that place a little today.

Sharing on Sunday #6...Winner

The winner of the Christmas fabric for last week's give away...chosen by Random Number Generator #17 is...

space
Woo Hoo!
space
Just need your snail mail address.


New give away coming right up!
~Karen~

Quick Gift Wrap...

space
My youngest daughter Kelsie graduated from high school last month and she has had so many graduation parties to go to. Last night was her best friend Sofia's party. Sofia and Kelsie have been friends since 1st grade. Remember this picture I posted from their senior prom. They were Dorothy and the Scarecrow for the Wizard of Oz play in 1st grade. Kelsie's in the red dress.
space
space
space
Well, Sofia is a Dunkin Donut iced coffee fan...a big fan. There isn't a day that goes by that I don't see a cup in her hand. So what's the best gift for her...a Dunkin gift card. We also gave her a silver charm for her Pandora bracelet. Have you seen Pandora charm bracelets. They are awesome gifts and so meaningful. Each bead or charm can be picked out to have a special significance in your life and they are so cute. My 2 daughters and I each have one. Pop over here to see their site. We bought her the little house charm and put on the card..."our house is always your home".
space
What better way to wrap it than in a Dunkin Donut iced coffee cup! I put in some natural colored crinkly grass so it looks like the color of the coffee and cream.


See the grass...it looks like the same color.
space

Put the gift card and the charm inside, put the cover on and in goes a new straw. I tied on ribbons...the color of Dunkin Donuts. When I bought the gift card, I asked for the empty cup. She charged me 25 cents! Oh well, next time I'll just save one.
space
I do this at Christmas time for the girls in their stockings too. I get small McDonald's, Burger King and Subway cups and do the same for their gift cards. They never charge for the cups though.
space

Here's the grass I used. Do you save the grass from gift baskets that you receive? I do...boy do I.


Boxes of them!


and labeled too.


Do you call it basket grass or is that just my crazy name for it? Either way, save it. It will always come in handy.
space
I'll be back later tonight for the winner of the Sharing on Sunday Christmas in July give away. There's still time to enter, so click the link. I'll also have another Christmas in July give away tonight too.
space
See you soon,
~Karen~

Friday, July 9, 2010

Friends On Friday...

I haven't done a Friends on Friday post in a while...definitely need to do more. On Fridays, I love to show pictures, projects or events from blogging friends. Today, I have 2 wonderful ladies to share.
space
The first is my friend Gra...Hi, Gra! Her name is Graciela or Grace and her wonderful blog is Chez Gra. She lives on the coast of Argentina. You have to go visit her blog. There are so many wonderful pictures, quilts and projects, like the one pictured below ( she allowed me to use her pictures). When you visit her blog, just click the translate button on the top right side bar...it works great.
space
This project is made from old photo albums that she no longer used. Don't we all do this...keep something, knowing we'll do "something" with it "some day". Well, this project is the reason I don't throw anything away.
space
First, she carefully pulled apart the pages of the album and cut in between each picture pocket so as to not cut through the sealed edges on both sides.


space
She then used recycled card board and wrapped her fabric samples around it.


Now she has this fabulous way of carrying the samples to the quilt shop to match to other fabrics. Plus you can showcase different fabric to see which ones will look best together for a quilt. The clear plastic holders are great to keep fabrics clean in your purse too.
space

This is such a wonderful idea and recycling too. Thanks so much Gra for letting me show your idea to everyone. I know we are in the age of digital cameras and we're keeping pictures on disks now, so we all must have these albums tucked away some where. Let's all go and dig them out and start cutting them up!
space
space
My second Friend On Friday is Carol Riggs. Carol emailed this week and asked if she could use a couple of my tutorials for demonstrations in her NEW quilt shop. Well, of course I said yes. I always love sharing! and a NEW QUILT SHOP...Woo Hoo!!!
space
I am so excited for Carol and her sister, I want to share their new quilt shop with you. I know this only might apply to people in a certain area in the country, but if you are ever traveling or vacationing in Kansas, please stop by.
space
Their shop is:
space
Sew What Quilt Shop, LLP
162 W.Main
Marion, Kansas 66861
1-620-382-2020
space
Their grand opening was today (sorry for this late post) and tomorrow the 10th (still time!!). She had mentioned in an email that they will have a blog some time in the future. When that happens, I will definitely pass it on.
space
Thanks for stopping by Friends on Friday. If there is any project you'd like me to share with everyone, just send me an email!!
space
Have a great weekend,
~Karen~

Thursday, July 8, 2010

Great Broccoli Salad Recipe...

I wanted to share this recipe with you before the 4th of July, but craziness set in with visitors and the weekend of cookouts. This is still a great recipe for any time of the year though.

Broccoli Salad
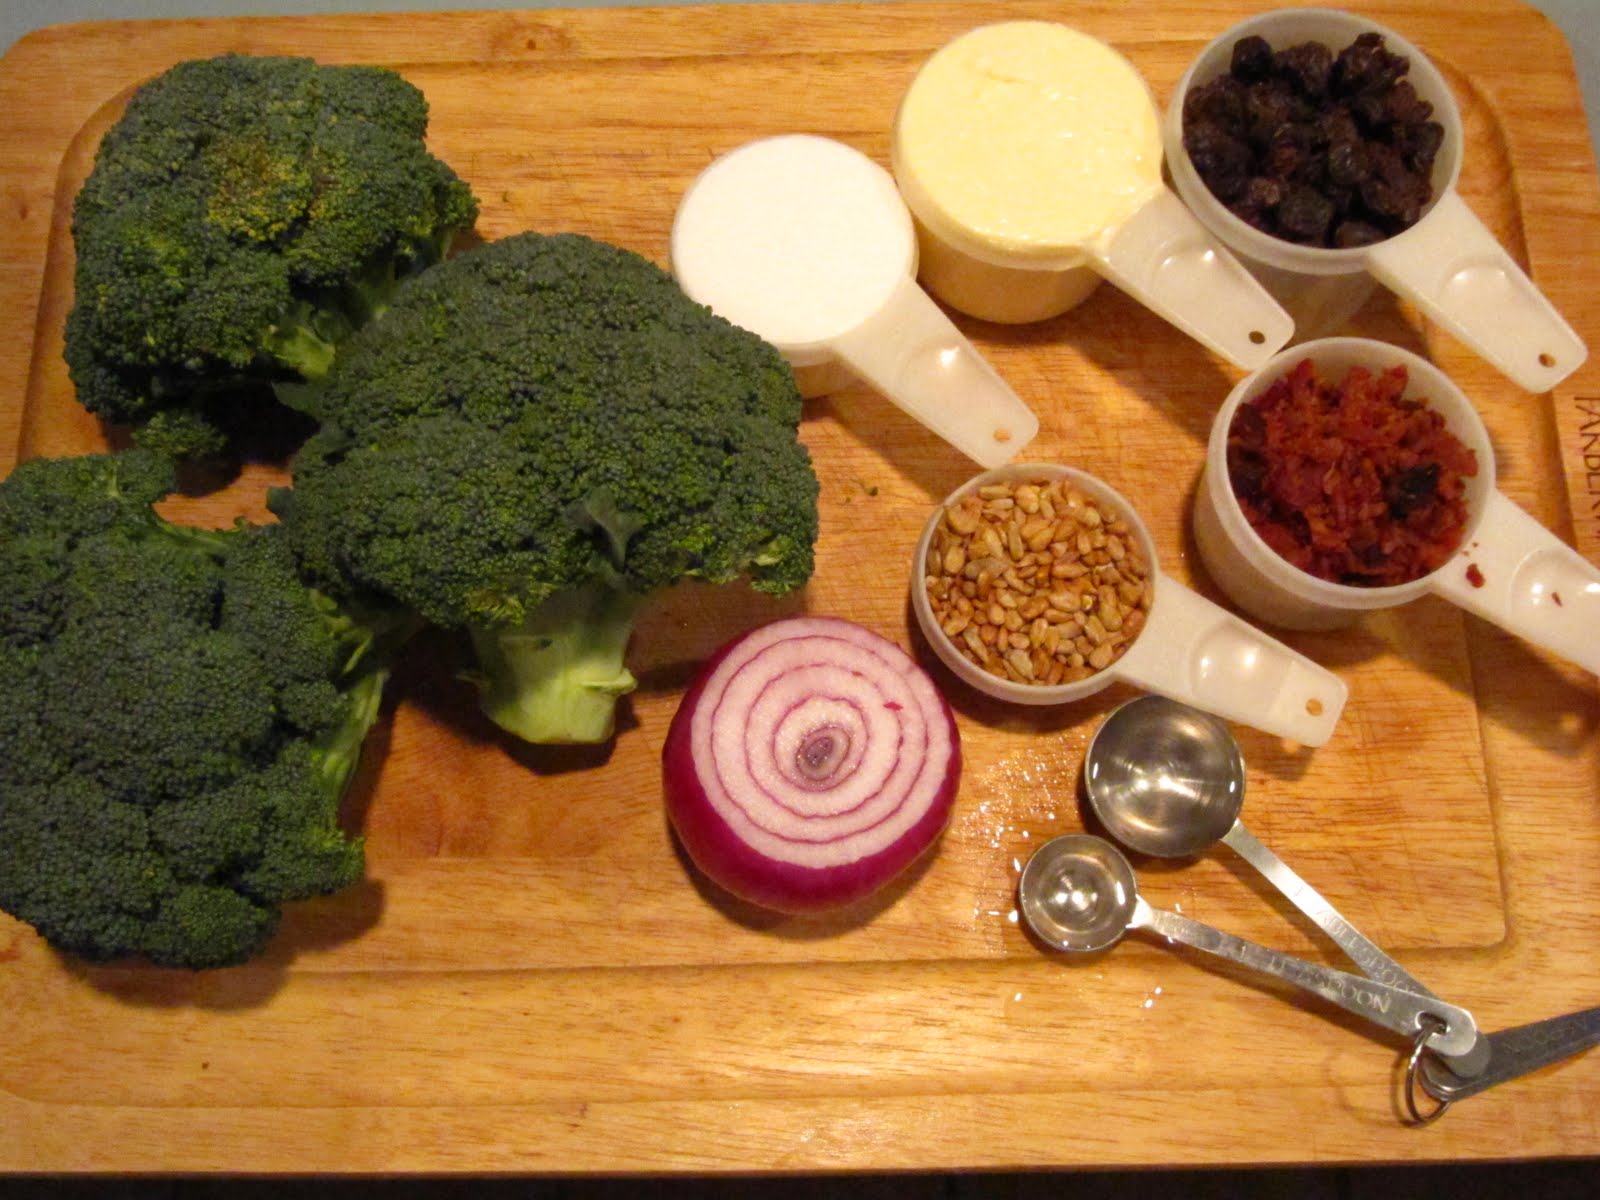
  • 2-3 bunches of broccoli, raw and cut into bite size pieces (not a lot of the stem)
  • 1/2 pound bacon, cooked and crumbled (I used the cooked, bagged kind this time pictured below and it worked great...no mess!)
  • 1 small red onion, chopped into small pieces
  • 1 cup raisins
  • 1/3 cup sunflower seeds (just the seeds...no shells. A friend put the shells in hers when she tried to make this, why I don't know, I said SEEDS Lol!!)
  • 3/4 cup mayonnaise
  • 1/2 cup sugar
  • 1 and 1/2 Tablespoons white vinegar
Directions:
  • In a large bowl, mix chopped raw broccoli, cooked bacon, chopped onion, raisins and sunflower seeds and set aside.
  • In a small bowl, mix the mayonnaise, sugar and white vinegar to make the dressing. Pour over the broccoli mixture and mix well.
  • Refrigerate for a few hours so flavors mix. I made mine in the morning and served around dinner time. Still very tasty days later too...if it lasts that long. This one is always popular!
  • One tip: You may want to double the dressing recipe (mayo, sugar, vinegar) just in case your heads of broccoli are large. Dress the salad with as much as you'd like according to your own taste though.


I'm hoping to share more recipes along the way. Hope you enjoy this one. Let me know if you make it and if you liked it!!
space
Take care,
~Karen~

Monday, July 5, 2010

Tool Time Tuesday...Vertical Storage

space
Happy Tuesday! Today's tutorial is storage and recycling all in one. Not just any storage...vertical storage. All the flat surfaces on my shelves and tables are stacked high and I needed space for all my spray cans. They were down stairs in the basement on my husband's work bench, but I'm the one who uses them the most. It will be much easier if the cans were in my craft/sewing room.


I found this old plank in my dad's shed and it is just what I wanted...
space


Old and beat up. Not sure if I want to leave it natural like this or rub it with a clear stain to bring out the natural color of the wood. Will see!
space


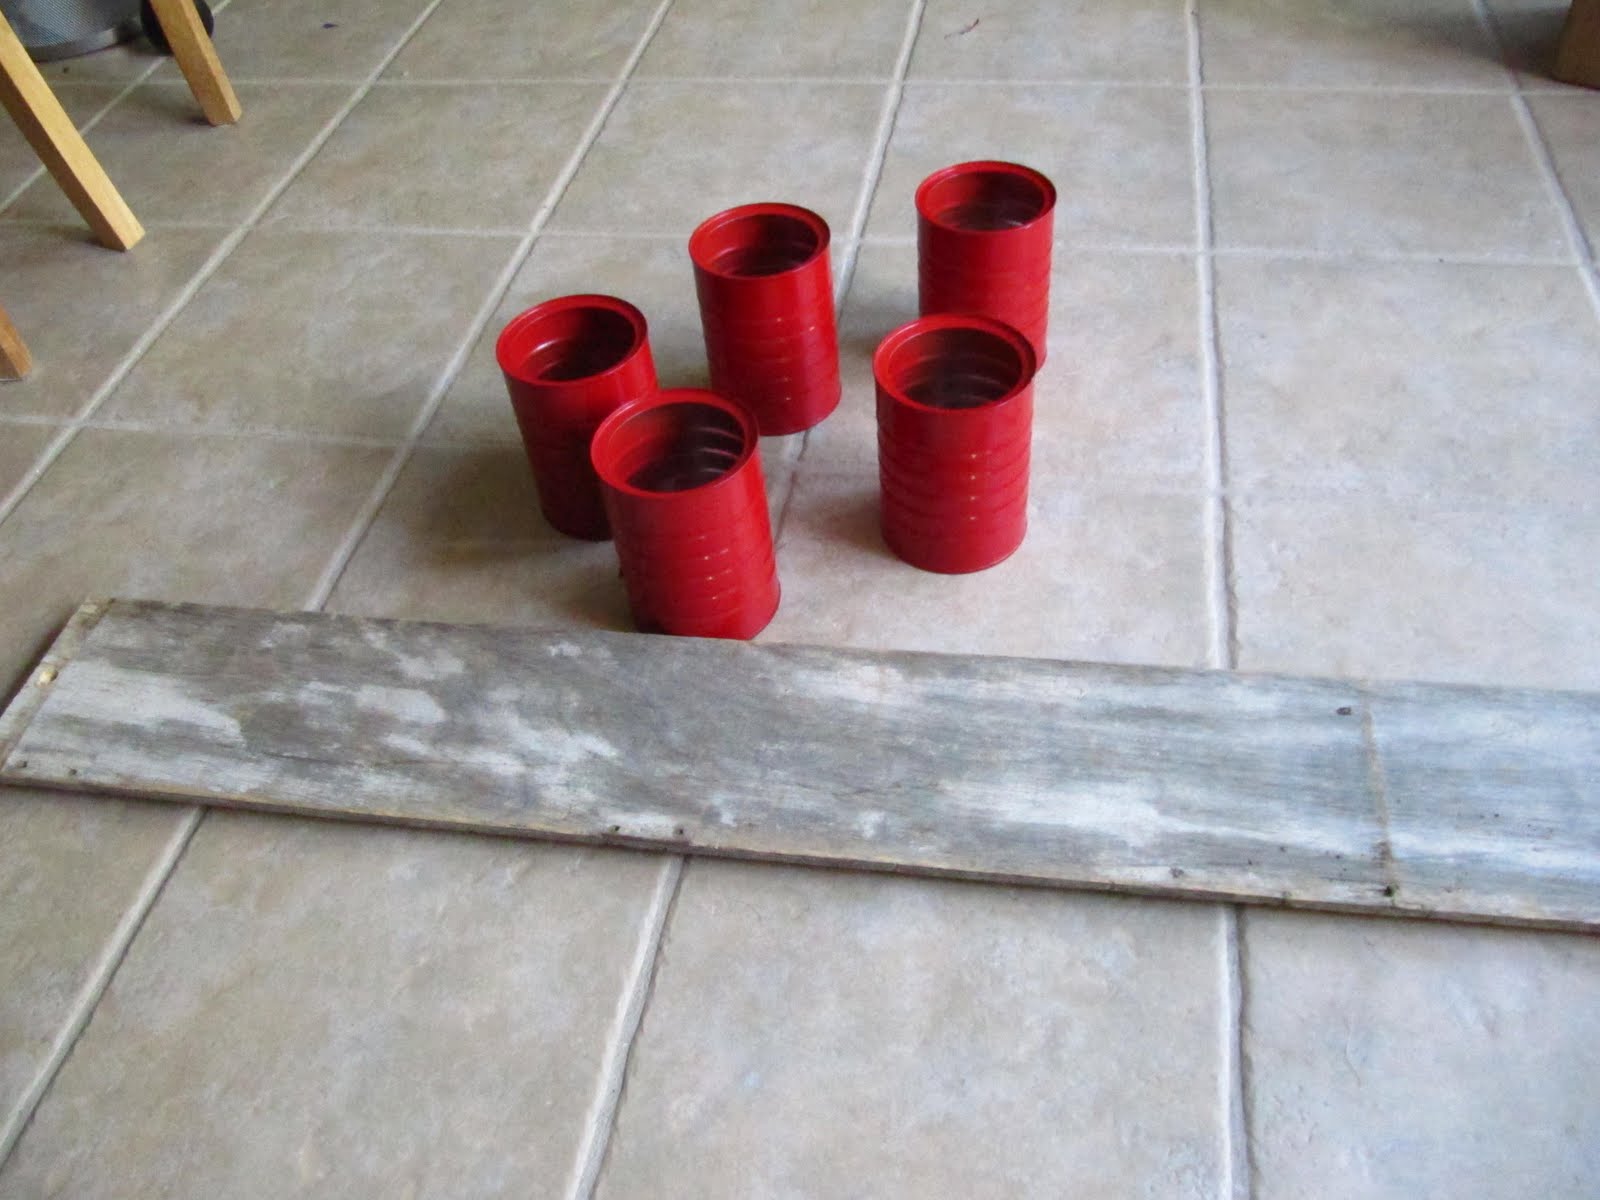
Here is the recycling part. Coffee cans and more coffee cans all ready to be spray painted
space

First peel off the paper to reveal the metal.


I picked a bright and cheery red, the new accent color in my sewing room


Take your cans and the wooden board...


and line them up to decide the distance apart.


I also added one of my pipe straps for a handle at the top of the board.


Since I was using many cans, I cut out a template to speed up the process. Trace the can on card stock or card board.


Cut it out and...


fold in quarters.


Poke a hole in the center for marking.


The next step is to find the placement of each can. My can centered with an inch on each side and 1 1/2 inches between each can.


Mark the center.


Pre drill a hole.


Now you need to find the center of each can on the bottom.


Just place the same template on the bottom.


Mark and...


drill each hole.


This view is the inside of the can. Just take a small screw and going from the inside, screw it into the pre drilled hole in the wood.


and here they are all attached.


Now I can just lean it up against any wall or cabinet. This is dead space, but now it's my paint center with a pop of color too.


I still have space on the bottom for more cans...guess I need to drink more coffee!
space


Here's a little update...I now use the vertical storage for string!!


Here is another post I did a long time ago with coffee cans that is another great spray paint can holder. Click here to take a peek at that one too.


I know I mounted my cans on a board, but you can also just screw them right into the wall over your work table or on the back of a cabinet or the side of a bookcase or on the inside of a closet door. Maybe even in your garage or on the wall going down to your basement.
space
You don't have to use this for spray cans either. How about...
  • scissors
  • pens/pencils
  • rulers
  • tools
  • rolled up fabric
  • skeins of yarn
  • magazines
  • patterns
  • string
  • hot glue gun sticks
  • and all your special crafting needs
Start saving or I know some of you already have cans tucked away for a future project, so get them out, paint them up and start your vertical storage today!!
Have a wonderful Tuesday,
~Karen~

Wisata Danau Toba - Sumatera Utara

Danau Toba adalah salah satu destinasi wisata alam terbesar di Indonesia dan terletak di Sumatera Utara. Ini adalah danau vulkanik terbesar ...