space
All you need are nails, of course...

some of your favorite fabric...

this fabric has a little sparkle in it. The size of the print or design doesn't matter much, because you will be rolling it up so only some of the design will show.

You will also need some kind of glue. I always use Mod Podge. It works great, it dries fast and it also acts as a sealer. It comes in matte or glossy. The beads you will see here are matte finish.

Below are tutorials for 2 different types of beads.
space
The first bead is one that is the same size and thickness all the way around. The second bead is a tapered one.
space
For the first bead, I just ripped a strip of fabric about 3/4 inch to 1 inch wide by 7 inches long.
- The width of the fabric is the width of the bead.
- The length of the fabric is the thickness or how fat the bead is.
space

Start by placing the wrong side of the fabric under the nail and start rolling.

I pulled the tail of the fabric with my right hand, while I rolled with my left. It kept the fabric taught.

When you come to the end, add a dab of Mod Podge or glue.

Seal the end over. I also rubbed more Mod Podge over the whole bead to seal the fabric. It still feels soft and flexible when it dries.

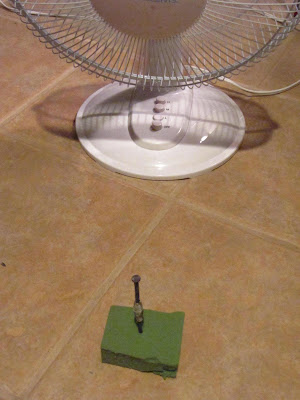
I then used my high tech drying system...Styrofoam and a...

Fan.

When it dries it slides right off, because you only used the glue on the outside not near the nail.

Here it is! Isn't it cute? These picture were taken the next morning so they are a little brighter. If you rip the fabric like I did, you can trim the little fly aways now or leave them for a textured look.

Here is the inside tube that the nail formed. If you have a certain necklace that you want to use, make sure the nail is thick enough to make the hole in the bead fit over the bail of your necklace.

I added a sterling chain...plain and simple.


or you can put it on a leather cording with some extra beads. I just used what I had at home. I think if I started a bead hobby (another hobby) I would have to commit myself.

The next bead is a tapered one. I'm using Christmas fabric in honor of Christmas in July.

This fabric you will have to cut into a long skinny triangle. You can free hand cut scraps or honey bun strips or jelly rolls. Remember the width of the strip is the width of the bead.

I cut mine one inch wide.
space
I folded the strip in half length wise, keeping the fold on the left side.

I placed my quilt ruler so the right outside edge of the ruler was at the edge of the fabric at the bottom of the strip.

Now, slant the ruler to the left until you reach the length you need. See where my finger is at the top. My strip is 6 inches long. Can you see the triangle shape under the ruler?

Here's a close up. Now I used a rotary cutter and trimmed up the ruler at that slant.

Just open up the fold and now you have a even sided triangle.

Now take your nail and start wrapping the fabric over, but make sure you start from the widest end of the fabric towards the point.

Keep wrapping until you get to the pointy end, making sure to keep things centered as you roll along.

Glue the end as in the previous bead.


and seal the whole bead with Mod Podge.

Stick in your fancy drying system again.


I realized after I cut out that first triangle out of the scrap fabric, that I had left had 2 triangles staring me in the face.

So I cut them apart...

and made 2 smaller matching beads.


Here they are all dried and ready to be worn.


Now here they are the next day in better day light. I shouldn't craft and take pictures at 1 am any more! Made the previous pictures come out yellowy.

So pretty and so simple...made from scraps actually.

Thanks for always stopping by and don't forget this week's give away for Sharing on Sunday (Christmas in July).
space
Talk to you soon,
~Karen~


No comments:
Post a Comment