Monday, December 20, 2010

Tool Time Tuesday...Handmade Fabric Gift Bags

Happy Tool Time Tuesday! This is it...the last Tuesday before Christmas, so I thought I would show you how to make a super quick fabric gift bag. I know...sewing, but even if you don't sew very often, you can make these. All they have are 2 straight seams. Easy!

What's the "Tool" of the day? These cuties...they are called Fat Quarters in the quilt world, but some fabric stores have their own name for them. A Fat Quarter is a yard of fabric that is opened up to it's full width, so it would be 36 inches by usually 44 inches. Then that piece of fabric is cut into quarters. Each piece is then 18 inches by 22 inches. Click here for the explanation I did a while back. If you by a quarter of a yard right off the bolt, that measurement would be 9 inches by 44 inches. Buying a Fat Quarter, it's still a quarter of a yard, but Fatter!

You can find Fat Quarters at most larger fabric chain store and your local quilt shop. The big advantages to buying the pre cut Fat Quarters are

  • it's quick...no waiting in the cutting line
  • they're a great size for crafting
  • you can buy a variety of different fabrics and not spend a lot of money
  • they usually cost about $2.00 -$2.50 each, sometimes less if they are on sale. My sister bought these for me...and I think they were only $1.00!!


Some measurements are dependent how wide the fabric was to begin with. This fat quarter is 18" by 21".


Here's a quick tutorial to make 2 gift bags from one fat quarter. Open up the fabric...this piece has the 18 inches on the bottom of the picture.


Cut it in half, so each piece is now roughly 18 inches wide by 11 inches tall.
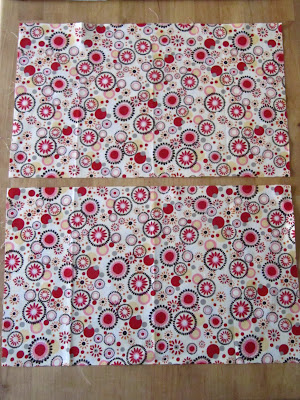

Take one of those pieces and fold over the top edge about 1/2 inch...


and iron flat.


Fold over again to have a nice clean edge...hiding the raw edge.


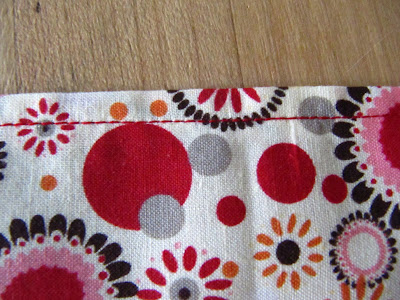
Sew a straight seam across the top.


Here is the finished edge on the right side of the fabric.


Now take a matching ribbon about 24 inches long or so.
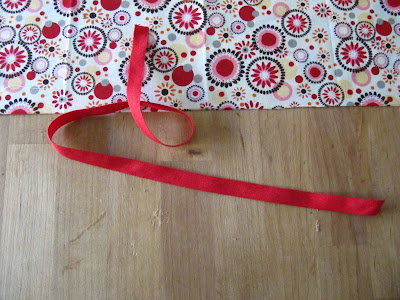


Fold it in half.


Now take the folded end...


and place it about 2 1/2 - 3 inches down from the top of the seam you just sewed.


Pin in place.


Now take the left edge and fold it over to the right edge. Right sides together.


Pin the sides and the bottom together. I sewed with a 1/4 inch seam.


Now, starting at the top right edge, sew down the side...


leave your needle down at the bottom corner and pivot or turn the fabric...


and then sew across the bottom left edge. Back stitch at the beginning and the end to secure the seams.


This is a close up of the pivot at the corner. If you pivot and turn the fabric, it's only one quick seam with one motion!


Turn right side out, iron the seams and you're done! A fast, and re-usable fabric gift bag with a tie already attached.


Just fill with goodies and you're good to go!


Don't forget...you get 2 of these bags from one fat quarter.


Here's another idea for a wine bottle gift bag. You'll get one bag from one fat quarter.


This measurement may vary depending on how fat your wine bottle is. ( wow, I've said the word Fat a lot in this post...not a good time of year to use that word as I'm eating a cookie as I type!) My measurement was about 13 inches by 15 inches. You can always use the strips that you cut away to make a matching tie for the bag too!!


The steps are all the same. Finish the top edge, add your folded ribbon or tie...


Fold over the left side to the right and sew your 1/4" seam.


Quick, easy and "sew" pretty for a bottle of wine.


Don't forget to make a set of matching coasters. Click here for the tutorial. You can use them as a regular coaster under the glass...


or as a snuggie coaster that stays on the bottom of the glass.


Always stays on to protect your table.


Great last minute gift set idea! A bottle of wine in your gift bag, glasses and a set of matching coasters.


Have a wonderful Tuesday. Now get out there and buy some fat quarters and have fun making these bags!
space
~Karen~

Wednesday, December 15, 2010

Coffee Table Makeover...Mod Podge Style

Did you ever live with a piece of furniture that you really don't like for a very long time and then all of a sudden...on a whim...you want to transform it. Well, that's the story of a coffee table in our family room.

When my parents moved in with us, they had 50 years worth of furniture that they had collected while traveling the world with the army. My mom was also a yard saler/thrifter and loved her deals. They had several teak dining room tables that they bought while thrifting years ago. This table was one of them.

However, we didn't need a dining room or kitchen table, so a few years ago I switched out the legs of the dining table for the legs of a coffee table. It works great as a coffee table...large enough for all our family gatherings and parties. The thing I hated the most...my dad varnished the crap out of it. Sorry about that, but I couldn't explain it any other way. The wood was so shiny, you need sunglasses if the light hit it. Ok, maybe not that shiny, but not the natural wood look that I like.

What are my quickest options...sanding (no), chemical striping (no), painting (no) because that would require sanding and priming. What's the answer...MOD PODGE and an old dictionary!

Here is the semi before. Forgot to take a full picture of the table before I started gluing.


Guess when I started this project...the day before Thanksgiving, when we were having 25+ for dinner. I told you it was a whim.


Boy was I keeping my fingers crossed with every page I glued down. The girls were home from college and all they kept asking was...Do you think daddy will like it? Well, maybe not looking like this in the middle of the project...but I knew it would be great when it was all dressed with accessories. So I glued faster...


tore more pages out...


and glued some more!


Looks good, but needed to dry to get the full effect.


and here it was all set for Thanksgiving, just a few hours after I started.


What do you call your TV remotes? We call them clickers and we have a box of them...tv, dvd, vcr, wii.


Here it is all set for Christmas. For last weekend's party, it was covered with food and drinks and held up perfectly. We have another party this weekend, so I'll let you know.


I always put a wreath on the table...it adds some color and when we have a party, I add a pedestal plate for appetizers or a punch bowl for egg nog in the center of the wreath.


I had mentioned before I am a clearance woman...I bought 4 of these wreaths at a gift shop for $1.00 each...woo hoo!!


Here's the link to the Tool Time tutorial where I made these boxes. More ideas over at that post, so don't miss it! That galvanized plate is a switch plate from the electrical section in the ( where else) the hardware store!


When I was tearing out pages, I made sure (thanks to Courtney) to pick a few words that had meaning to our family. The girls danced their whole life together and Kelsie is still dancing at college.


Courtney is a graphic design major.


Hubby's favorite sport...Golf!


Courtney's boyfriend Courtland loves every thing to do with music.


and mine is sewing...I love to sew, but if they had the word blogging in this 1952 dictionary, I would have ripped it out and glued it right in the center! Our last name is in the dictionary, so that's fun to have that on there too.


Remember when you are using Mod Podge...brush on a coat of glue, add your paper and then add another layer of glue right on top of that. Once it dries, the top coat acts as a sealer to protect the paper.
space
Hope you can give this a try. You can use any paper...scrap booking, old books, copies of photos etc. If you want to do a smaller project, try a tray or side table to start.
space
Take care,
~Karen~


I'm sharing this post at It's a Hodgepodge Friday...come join the fun! Also sharing at Just A Girl and Tatertots and Jello and Funky Junk Interiors.

Wisata Danau Toba - Sumatera Utara

Danau Toba adalah salah satu destinasi wisata alam terbesar di Indonesia dan terletak di Sumatera Utara. Ini adalah danau vulkanik terbesar ...