Friday, August 26, 2011

Battening Down The Hatches...

Prayers for everyone along the east coast the next few days. Irene is fast approaching. We live along the coast of southern Rhode Island, about 6 miles from the beach. This is a nasty one.

I hope to do a few posts today and tomorrow to go up this weekend and next week, but I know we'll lose power on this one.

As they have been saying on the news..."prepare for the worst, but hope for the best"

Say a little prayer for everyone,
~Karen~

Went for a walk on the beach this morning with my husband...calm before the storm.

Wednesday, August 24, 2011

Make A Gift On The 25th Club...Cell Phone Key Chain Case Tutorial


Welcome back to "Make a Gift on the 25th Club". On the 25th of every month, every one who joins the club will try to make a gift for Christmas. You can read the original post HERE, but the gist is...we all proCRAFTinate around the holidays and planning some crafting or sewing on the 25th of each month will help us stay ahead of the game!! If the actual 25th isn't good for you...some time the week of the 25th is great too!!

So join in on the fun and sign up today. Grab the Christmas button on my right side bar to remind you each month!! If you click the "Button" button it will show you how to add a button to your blog. Wow, that's a lot of buttons is that sentence LOL!!!

To help you each month, I'll try to have a tutorial for you...last month's scarf tutorial HERE

and here is this month's...a key chain cell phone case.  


This tutorial is similar to the other eye glass case holder and book mark case...just different measurements. Click HERE and HERE for the other tutorials.

You need...
  • 2 strips of fabric 4 inches by 12 inches (longer or wider if your cell phone is bigger)

  • "D" ring

  • key chain rings

  • piece of ribbon 4-5 inches long


Loop ribbon through the D ring and pin.


Place fabric right sides together.


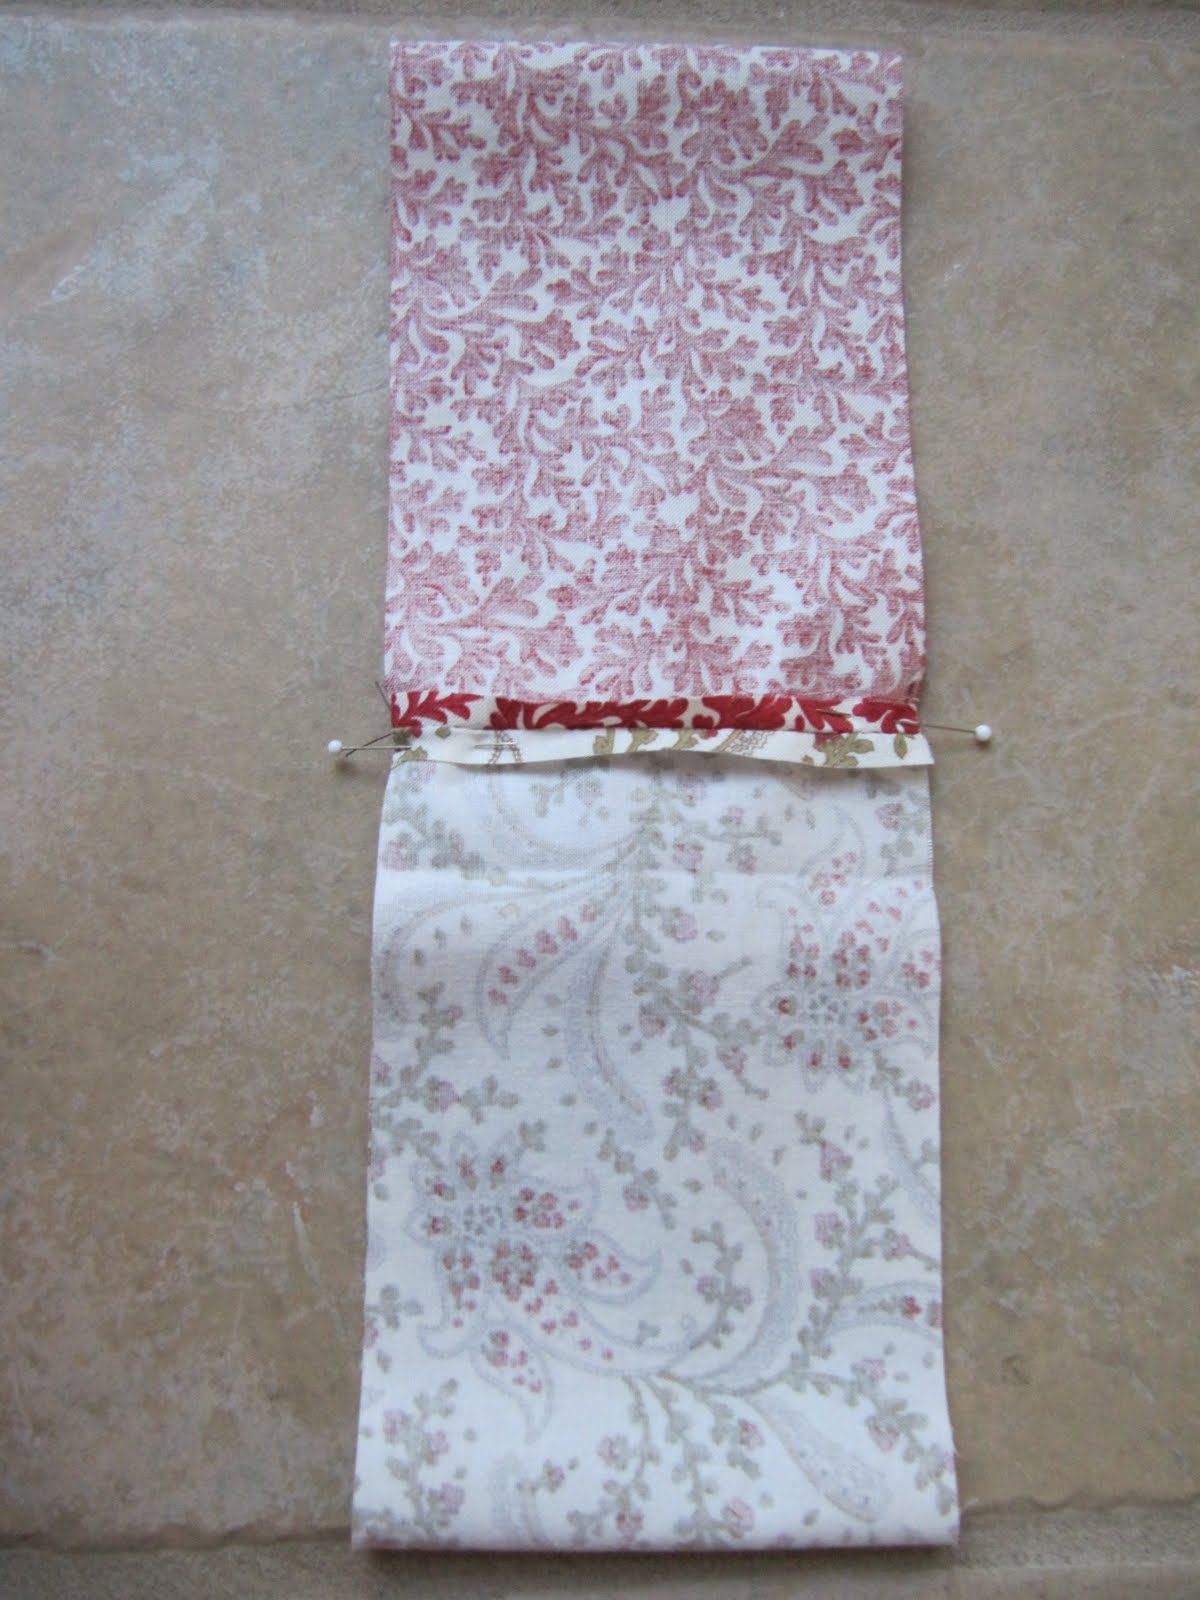
Pin one of the short edges...


On the other short edge, center the ribbon with the D ring on the fabric...


cover with the other layer...


and pin in place.


Close up of the layers with the ribbon.


Sew with a 1/4 inch seam. I went over the section where the ribbon was a few times to really secure it.


Sew the other short edge with a 1/4 inch seam too.


2 short edges sewn...long sides still open.


Bring up the bottom seam to match the other seam in the middle.


Match the seams.


and pin in place.


Sew one long side completely with a 1/4 inch seam and then sew the other long side, but leave a small opening for turning.


See the opening?


Turn right side out.


At this point the case is reversible, so you can decide which fabric you'd like.


Just push the lining fabric inside the pocket of the other fabric. Iron flat.


Add your key rings to the "D" ring. You could just have one ring on the ribbon instead of the "D" ring, but it's easier to remove one key if needed.


Now you are all set to add your cell phone and debit card and you're good to go!!


To keep the cell phone secure, you can add 2 dots of Velcro, snap, hook or button.


Stick or sew in place...which ever you have on hand.


Perfect gift for any one!!


Happy 25th,
~Karen~

Thoughts on Thursday...

E.S.P.

Excrutiating. Sudden. Pain.

Biting your tongue or stubbing your pinky toe.

I did both in the same day.

Almost brings you to your knees!! LOL

I know there are worse things in life, but those are up there.

By the way...that pinky toe. What do you call it...pinky, piggy, baby, that broken thing on my foot?  LOL!!!

Happy Thursday,
~Karen~

Monday, August 22, 2011

Tool Time Tuesday...Knee Pincushion

I know...knee pincushion? Thought that title might get you!!

Just came up with this idea in the car driving home from a little New Hampshire vacation on Sunday. I was sewing hexagons in the car and forgot my cup holder sewing kit at home. Click link for that tutorial.

I kept using the cuff of my shorts as a pincushion. I said to my daughters..."I need a knee pincushion" and the head band idea immediately popped in my head. Courtney had one with her, so I tried the bobbin of thread I had with me and it fit perfectly!!


This is the pattern I came up with Monday morning, but you can add your own pincushion if you want.

You will need...
  • one thin metal or plastic head band

  • 5" x 5" charm square or scrap piece of fabric

  • bobbin full of thread


just make sure the bobbin hole fits over head band


Now take your 5" x 5" square of fabric and cut in half.


Then cut the 2 halves into 2.5" x 3" and 2.5" x 2"


Take the 2.5" x 2" pieces and place them right side together.


sew 1/4" seam on the longer sides


turn right side out.


iron flat


it forms a tube, open on 2 short ends


Place the tube on the larger piece.


and cover with the other piece...right sides together.


pin in place...holy mackerel...look at that crooked pin. Must have hit that one sewing 90 miles an hour. LOL !!


Leave an opening on the short side...not where the tube was added.


clip corners.


turn right side out.


iron flat


Add stuffing as much as you'd like. You can also add a piece of card board inside if you want to protect the part that's up against your knee.


whip stitch opening closed.


Run the pincushion and the bobbin over the head band.


and place it over your knee!!!

The bobbin of thread won't run all over the place and your pins and needles are always there.


The head band is springy enough to stretch...especially the metal ones.


Also fits over the arm of a chair. This arm is a little big, but it stretched. Plastic ones might snap if stretched too much.


Kelsie woke up this morning (Monday) and was joking around with the knee pincushion right after I sewed it, so I thought I would share!!!

A sewing head band...Don't sew like this! LOL !!


Happy Tuesday,
~Karen~

Wisata Danau Toba - Sumatera Utara

Danau Toba adalah salah satu destinasi wisata alam terbesar di Indonesia dan terletak di Sumatera Utara. Ini adalah danau vulkanik terbesar ...