Showing posts with label fabric. Show all posts

Monday, January 16, 2012

Tool Time Tuesday...File Your Fabric

Happy Tuesday! You all know Tool Time ideas and supplies come from all sorts of places...hardware stores, automotive stores, paint stores, the recycle bin etc. Well, today it's from the office supply...actually the file cabinet in my sewing room, but you can find it in the office supply.

You know they say..."necessity is the mother of all inventions." My necessity is...I needed a new place to store my fabric, because it was getting too much sunlight. However, you know I don't like to spend money!!

Here's what I came up with in desperation to keep my fabric neat, ironed and out of the sun.

Isn't it so pretty?


This is where I keep my fabric now...right out there in the bright light. Click here for a link to the rest of my sewing room ideas


I loved this method too...easy access, fabric is pretty, I can see what I need or have. The only bad part is...if I want that bottom piece, things get a little wonky.


Not to mention that whole wall of windows on the right side of the room streaming in the fabric fading light!


Here's what I came up with.

I have this file cabinet next to my sewing table. On top is set up for a cup of tea when crafting.


Inside it stores all my greeting cards by holiday.


Not for long...this is just the start of my new fabric filing system!!!


The fabric hangs on a Pendaflex Hanging Folder...
  • easy to see
  • keeps it ironed and wrinkle free
  • file by color, designer etc
  • out of the sunlight!!


Buy the pendaflex folders by the box.


and get your fabric ready!!


Since it's a folder, there are 2 sides...


Open up the folder...


and cut it in half


This is a half yard cut of fabric folded in half, selvage edge on the bottom...


fold in half again...


Place on file folder...


and fold the fabric over. The selvage edge will be draping down next to the sides of the folder


Hang in your file cabinet


For longer yardage of fabric, do the same thing by folding it in half and then half again (fold goes to the selvage edge). Your yardage (1,2,3 yards) lays out left to right.


Now just wrap the fabric over the file folder.


If there is a lot of yardage, you may not want to cut the folder in half...having the 2 parts will add strength for the weight of the fabric.


All wrapped up and ready to hang.


Ahhh...so pretty and neat...and safe from the sun. Maybe I should move my tea station though


Now I just need to get my butt in gear and sew something...I think my hobby really is organizing my supplies and not doing anything with them!!! LOL

I also need to be on the hunt for yard sale or thrift store file cabinets!

EDIT...there have been a few comments about the acid in the paper of the folder or the color bleeding. I'm not sure about the color, but the Pendaflex file website has a big ACID FREE sign on the page about the Pendaflex files. Click here to visit their site.

If you are worried about the color of the file, they do sell manila or no color folders or you could just place a piece of tissue or acid free paper between the fabric and folder.

Have a great day and have fun playing with your fabric.
~Karen~

Sunday, January 9, 2011

I Need Your Opinion...

I think I might take the plunge into selling some of my handmade items. However, I have a dilemma...well, not really a dilemma, but more of a business question.

When I walk into a fabric store or a quilt shop, I LOVE it ALL. I really do love all fabrics, but I'm drawn to certain ones more than others and continually buy the same type.

I love Moda's 3 Sisters (absolutely everything they've ever made)...


I swoon over all Moda's French General...


and so many others.


Then there are the trendier fabrics like Amy Butler that I love, but never buy...not sure why.


April Cornell...beautiful, but still never buy.


Other modern fabrics are Joel Dewberry and Kaffe Fassett. I think they're great, but for some reason they never end up in my stash. Maybe because they are out of my comfort zone or they're not the style of my home...not sure why.

So here's the question for you (whether you sell your own creations or not)...

  • Do I make things to sell with fabrics that I love and I'm drawn to?

  • or do I make things with trendy modern fabrics to please more people?

  • or make things with both?

My thinking is a certain look for my whole shop...color, style, etc. Do I stay with a "look" or mix it up to fit a broader group of people.

Does this make any sense or am I rambling...ok that's another question LOL. I'll stop now!

Thanks for your input. I can always depend on my blogging friends.

~Karen~

Friday, October 15, 2010

Friends, Fabric and Food...

There's no better way to spend a Friday than with friends, fabric and food. Last Friday I went to a new to me fabric store with my friend Tina from Seaside Stitches. Tina and her friend Janet (no blog, but I think we should convince Janet to start one though, lol !!) invited me to join them for a day of shopping at Ryco Trimming Co. This store is amazing...6000 bolts of quilt fabric and trims to die for. I think I went to ric rac heaven!

Another blogging friend, Shellie, from Shellie Sews, works at Ryco. It was so wonderful to finally meet her in person.

The picture below was taken in the store. Tina on the left, Shellie in the middle and then me on the right. Next time we'll remember to take a picture with Janet and my sister...they were taking this photo.


Here are a few of the things I purchased that day. Isn't this the cutest Halloween fabric from RJR.
space


and great Christmas fabric too!


Here is a picture of the trim I purchased. I could have stayed in that section all day.


Isn't this JUMBO ric rac the best.


My sister happen to call me while I was in the fabric store, so she met us there too. We all went for lunch and had a great time. I made 2 wonderful new friends in Shellie and Janet that day.

Thanks ladies for a wonderful time!

If you want to follow two wonderful blogs, hop on over to Tina's and Shellie's blogs...they are fabulous. So many great quilts, projects and pictures. Here are their links...Seaside Stitches and Shellie Sews
space
Have a great Friday,
~Karen~

Sunday, July 25, 2010

What's a Fat Quarter You Ask?...

I've had a few emails asking what a fat quarter is. Fat quarters are those little folded squares of fabric you see at your local quilt shop or larger chain fabric stores. They are usually in front of the bolts of fabric. They are pre cut pieces of the bolts for a quick purchase (because you know I LOVE to wait in those lines at the cutting table in the big chain stores LOL), small project or scrap quilts. Here's a quick picture explanation.
space
Here is a piece of fabric that is one yard long...see the yard stick on the bottom. The fabric is unfolded, so the selvage (finished) edges are on the top and bottom.


Here is a close up of the 36 inch length of fabric.


Now cut that 36 inch length in half at 18 inches.


Here are the 2 strips 18 inches by the width of fabric (WOF).


Now, the usual width of fabric ranges from 42"-45" (that's the vertical ruler on the right)


Minus the white edge of the selvage, this fabric is just about 44 inches.


Now cut that in half at 22 inches.


and here you have it...4 fat quarters from one yard of fabric.
space
The usual measurement of a fat quarter is 18" x 22".


Hope this helps.
~Karen~

Monday, July 12, 2010

Tool Time Tuesday... Handmade Fabric Beads

Happy Tuesday! Happy Tool Time. What's the most common tool we all have? Nails...nails of every size and shape...tall ones, short ones, thin ones and fat ones. Well, go raid the tool box and bring those nails to your craft room, because we're going to make some jewelry.
space
All you need are nails, of course...


some of your favorite fabric...


this fabric has a little sparkle in it. The size of the print or design doesn't matter much, because you will be rolling it up so only some of the design will show.


You will also need some kind of glue. I always use Mod Podge. It works great, it dries fast and it also acts as a sealer. It comes in matte or glossy. The beads you will see here are matte finish.


Below are tutorials for 2 different types of beads.
space
The first bead is one that is the same size and thickness all the way around. The second bead is a tapered one.
space
For the first bead, I just ripped a strip of fabric about 3/4 inch to 1 inch wide by 7 inches long.
  • The width of the fabric is the width of the bead.
  • The length of the fabric is the thickness or how fat the bead is.
    space

Start by placing the wrong side of the fabric under the nail and start rolling.


I pulled the tail of the fabric with my right hand, while I rolled with my left. It kept the fabric taught.


When you come to the end, add a dab of Mod Podge or glue.


Seal the end over. I also rubbed more Mod Podge over the whole bead to seal the fabric. It still feels soft and flexible when it dries.


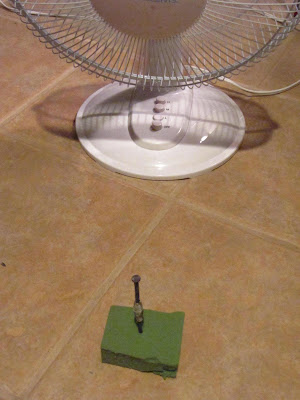
I then used my high tech drying system...Styrofoam and a...


Fan.


When it dries it slides right off, because you only used the glue on the outside not near the nail.


Here it is! Isn't it cute? These picture were taken the next morning so they are a little brighter. If you rip the fabric like I did, you can trim the little fly aways now or leave them for a textured look.


Here is the inside tube that the nail formed. If you have a certain necklace that you want to use, make sure the nail is thick enough to make the hole in the bead fit over the bail of your necklace.


I added a sterling chain...plain and simple.


or you can put it on a leather cording with some extra beads. I just used what I had at home. I think if I started a bead hobby (another hobby) I would have to commit myself.


The next bead is a tapered one. I'm using Christmas fabric in honor of Christmas in July.


This fabric you will have to cut into a long skinny triangle. You can free hand cut scraps or honey bun strips or jelly rolls. Remember the width of the strip is the width of the bead.


I cut mine one inch wide.


This next part I just made up as I went along, but it worked great for me.
space
I folded the strip in half length wise, keeping the fold on the left side.


I placed my quilt ruler so the right outside edge of the ruler was at the edge of the fabric at the bottom of the strip.


Now, slant the ruler to the left until you reach the length you need. See where my finger is at the top. My strip is 6 inches long. Can you see the triangle shape under the ruler?


Here's a close up. Now I used a rotary cutter and trimmed up the ruler at that slant.


Just open up the fold and now you have a even sided triangle.


Now take your nail and start wrapping the fabric over, but make sure you start from the widest end of the fabric towards the point.


Keep wrapping until you get to the pointy end, making sure to keep things centered as you roll along.


Glue the end as in the previous bead.


and seal the whole bead with Mod Podge.


Stick in your fancy drying system again.


I realized after I cut out that first triangle out of the scrap fabric, that I had left had 2 triangles staring me in the face.


So I cut them apart...


and made 2 smaller matching beads.


Here they are all dried and ready to be worn.


Now here they are the next day in better day light. I shouldn't craft and take pictures at 1 am any more! Made the previous pictures come out yellowy.


Just add your favorite chain and some beads.


So pretty and so simple...made from scraps actually.


Beadutiful...Ok you know I couldn't resist a play on words.


Thanks for always stopping by and don't forget this week's give away for Sharing on Sunday (Christmas in July).
space
Talk to you soon,
~Karen~

Wisata Danau Toba - Sumatera Utara

Danau Toba adalah salah satu destinasi wisata alam terbesar di Indonesia dan terletak di Sumatera Utara. Ini adalah danau vulkanik terbesar ...