Friday, February 3, 2012

Blog Buddy...How To Add Your Follow Me Pinterest Button

Pin It


I've had lots of requests on how to add a "Follow Me on Pinterest" button to the sidebar of your blog. If you're new to Pinterest...it's fabulous! It's a virtual pin board where you "pin" all your favorite things you find on the Internet to your own boards. It's like having a cork board for all different categories, right there in your own account!

If you want to see what Pinterest looks like...Click HERE to visit my Pinterest boards. I add new things to it all the time.

If you already have a Pinterest account and want to add the "Follow Me" button to your blog...here are the quick steps.

Click these pictures below to enlarge so you can see it better.

Log into your OWN Pinterest account...you must log in so your Pinterest address shows up in the HTML code.
  • click the "About" drop down menu
  • click on "Pin it Button"


Under the "FOLLOW BUTTON" section, there are several different styles to choose from. Click on the one that you would like...


A different HTML code will show up for each one.

Put your cursor over the code, right click and click COPY.


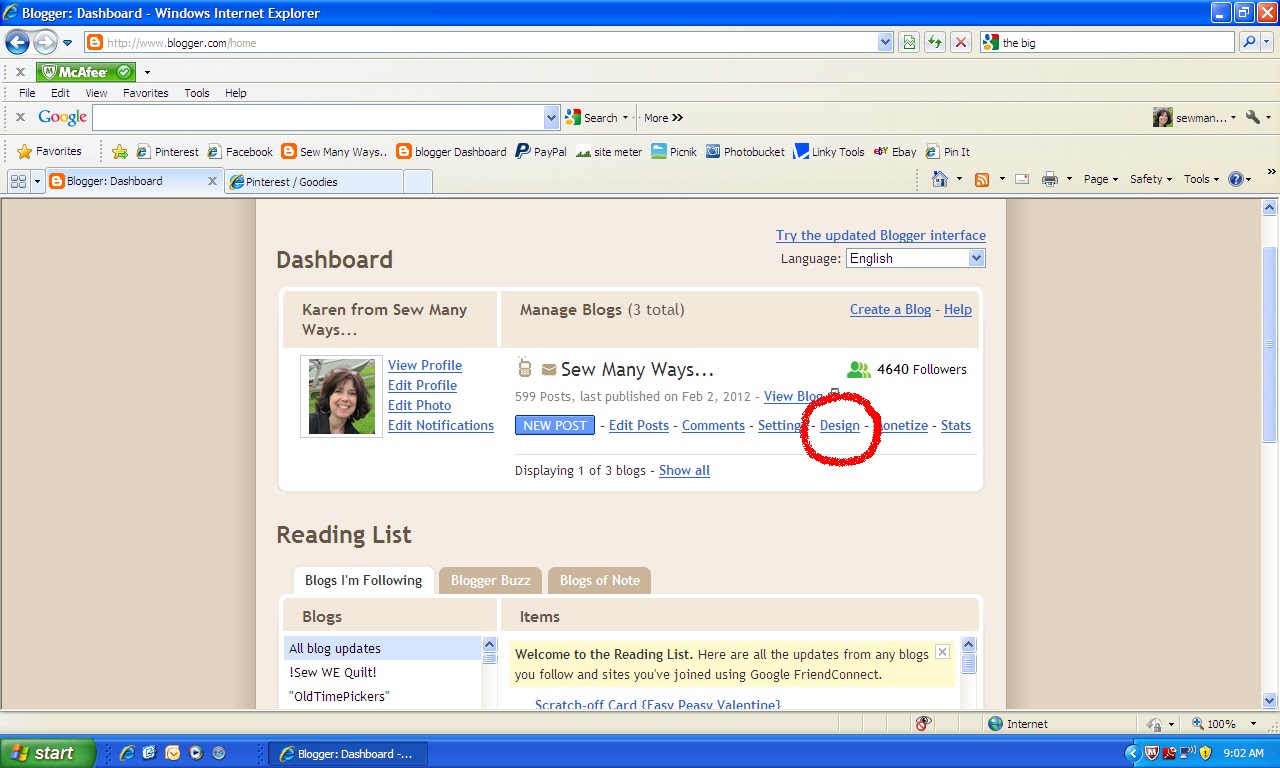
Now go to your Blogger dashboard...I'm still in the old interface, so I click DESIGN. In the new interface, I think you click LAYOUT.


Click ADD A GADGET...


Scroll down and click HTML/JAVASCRIPT


A box will pop up. You can type a title in there if you want...not needed though.

In the main bigger box, put your cursor in there and right click then PASTE the code in there. For some reason lately, blogger or my mouse won't let me paste in these boxes. I can paste in other places, but not here.

If you have problems with right click pasting, just place the cursor in the box and then on your keyboard..
  • hold down the Ctrl button and the "v" button at the same time. Should paste right in there


After it's pasted in the box, make sure you click SAVE


The new button will appear at the top of your sidebar.


If you want to move it down in a different spot on your side bar, DRAG and MOVE it down where you want.


If you move something you must click SAVE again.


There it is...a button that will link to your Pinterest account.


Hope this helps,
~Karen~

Wednesday, February 1, 2012

Thoughts on Thursday...

Pin It

Our kids introduced us to a (new to me) tv show about a month ago..."The Big Bang Theory". A comedy about nerdy science guys. I love it, so funny.

What's your favorite tv show?

Happy Thursday,
~Karen~

Monday, January 30, 2012

Tool Time Tuesday...Button Bracelet Tutorial

Pin It

Happy Tuesday! Today is an easy tutorial for a button bracelet. Get your button collection out. If you don't have one, find someone who does and go through it!!

I have a small button collection made up of things from my own projects, from my mother and my grandmother. They were both frugal and both loved yard sales...so I'm not sure where any of these buttons came from. If they had clothes that were no longer wearable, buttons were removed and saved in big glass jars. If they were at a flea market or yard sale and there were buttons...they would buy them.

and this is the result of all that button saving!


A family history on one bracelet...


Here's what you need...


I bought this charm bracelet at Walmart in the craft section for $2.00.


I also had these larger jump rings for the larger buttons. The little ones came with the bracelet, but didn't fit any of the buttons. You will need the larger rings for the width of the button from the holes to the outside. This package was about $2.50 for 60 and the size is 10mm.


You will also need buttons of course! You can buy new buttons in craft stores. Some actually come in group packages of the same color.


I used mostly pearlized buttons in different shades of cream.


First step...open up the large jump ring.


Slip the ring through any hole in the button.


Add to a loop of the bracelet and close the ring.


Plan out the larger base buttons to add them equally across the bracelet.


To make it look fuller without using a ton of rings, add 3 different sized buttons to one ring.


Depending on the thickness of the buttons, you might only fit 2.


Work your way down the bracelet.


This is so cute and you could be finished at this point.


or you can start adding different sizes, shapes and textures.


One pearl bead button and a small flat button.


I also found these clear crystal looking buttons. Can you see the thread still left on one of them? That shirt didn't have a chance. Lol


Look at this bunch someone tied up...so funny.


Added both on the same ring for a little bling!!


I love this picture of the pearl button towards the bottom of the picture. Can you see the shank of the button? It's verdigris. It must be brass or copper and old. I didn't want to clean...there's a story with that button.


Here's a Tool Time from someone out there...either my mom, my grandmother or someone who they bought the buttons from. My mom and grandmother are both looking down on me, so I can't ask, but I'll give credit to both!

They used bobby (hair) pins to hold the buttons.


Slide buttons onto the hair pin...and twist the bottom closed.


I love it!


I hope you had fun in my button box...

Hmmm...I'm thinking earrings too.

Have a great Tuesday,
~Karen~

Sunday, January 29, 2012

Thrift Store Finds...

Pin It


I have a favorite consignment shop in town that I try to stop by every week. Funny how I always seem to find at least one thing I "don't" need, but have to buy because it was a deal. This weekend was no exception.

Here's my loot for $10.00! Two candle holders, drawer organizers, organizing case and a phone charging station.


Black wrought iron candle tray...50 cents.


All cleaned up and ready for Valentine's Day.


Charging station with the surge bar inside. I needed one for my phone and camera. $4.00


Quick clean with Clorox wipes and it's already set up the same day I brought it home.


This candle was going to see my usual black spray paint, but I might be a little adventurous with this green paint first. 50 cents...I'll show it off when it's done.


These are drawer organizers that you can keep adding to for any size. Clearance section...60 cents


My crazy sock drawer before...


Woo Hoo...the after


This was brand new still had the labels on it...this is for work! You know my organizing just isn't for home...Lol !! $4.50


Venture into your local thrift store or consignment shop...you never know what treasure are in there waiting for you!!

Have a great start to the week,
~Karen~

Wisata Danau Toba - Sumatera Utara

Danau Toba adalah salah satu destinasi wisata alam terbesar di Indonesia dan terletak di Sumatera Utara. Ini adalah danau vulkanik terbesar ...