Wednesday, March 16, 2011

Blog Buddy...Adding Labels to Posts and Side Bar

Hello, Hello...hope you are all doing fine. I haven't done a Blog Buddy post in a while, so today I thought I would pick the topic of Labels.

What are Labels you ask? Maybe you didn't ask, but I'll tell you any way! Labels are categories where each of your posts can be listed so visitors to your blog can find a particular post fast and easy.

Labels are VERY important to a blog. Here's a scenario.
  • you did a post on say...a tutorial for sewing a purse or making a yummy chocolate cake
  • a visitor of your blog saw that post a while ago, knows it's on your blog, but not sure WHEN you posted it
  • a visitor to your blog doesn't have the time to search through every single one of your posts to find that tutorial or recipe.
  • where do they go? Well, to your LABELS section on your side bar
  • they just click on a category, such as sewing tutorials or recipes, and poof there are all your posts that you Labeled SEWING TUTORIALS or RECIPES!!
  • yay!! super fast.

Ok, here's the low down on LABELS...Click on each picture to enlarge to see the details and then click on it again to enlarge more

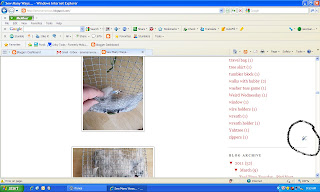
This first picture is of what the LABELS section looks like on the right side bar of my blog.


The black circled section is what it looks like under each of your posts. It tells which label you've chosen for a post.


Here is how you add LABELS to your blog...

Go to your Dashboard of your blog and click on DESIGN (circled in black)


This brings you to the ADD and ARRANGE PAGE ELEMENTS. Click on the ADD GADGET button (circled in black) on the right side bar.


This screen pops up. Scroll down until you find LABELS (circled in black). Click on the name or the PLUS sign to add it.


The Configure Labels window pops up. Choose how you want it designed and click SAVE. When it's added to your blog, the Labels will be on the top of the side bar. Just click and drag your new Labels section up or down to where you want it. Click SAVE again.


Now here are the steps for labeling your posts...you can do this when writing a new post or go back in and edit an old post to add a Label. When editing a post, go to the edit page, change what you need to on a post and click Publish again. It won't publish again on the day you are editing, it just makes the change and keeps it on the original date you published it.


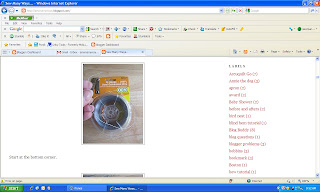
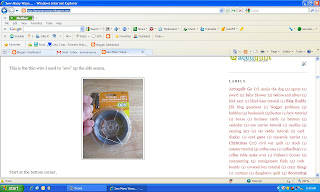
Here is a sample of a post in progress. When you're done writing, go down to the bottom box (circled in black) and type in your label name or category. When you start typing, the labels that start with the same name will pop for you to choose from.


Or there is a button on the right side of the box that you type in that says SHOW ALL (circled in black)


Click on that and all the labels that you have ever used in the past will pop up. Just click on the one you want to use and it will show up in that box.
space
Once you decide on a label and your post is published, that particular post will end up under that category in the LABELS section on your side bar.


For a quick edit of your labels, you can be on your main blog page and scroll down and see little Tools next to each gadget you have. Only you can see these icons on your blog page.
Click on the tools and that Configure window pops up. You can change the way your lists are shown on your blog...


The choices are LIST style (one label after another) shown below....


or CLOUD style, which is all the labels shown together and the font size changes on its own by how many posts are in the particular label. I chose to have my labels in a cloud style with the number of post in each category after the name.


If you ever want to remove a label from your list, you need to go to the edit page of all the posts that have that Label and remove the label name from that little space under each post.
space
I hope this helps. If you have any questions, please feel to email me. I don't know every thing, but I'll try to help. CLICK HERE for more Blog Buddy posts
space
Take care,
~Karen~

Monday, March 14, 2011

Tool Time Tuesday...Bird Nest Material

Happy Tuesday everyone! Today's Tool Time encompasses many things...hardware store finds, scrap fabric, thread, yarn, batting, dog hair (yes, I said dog hair), recycling, nature and helping little birdies. Wow, that's a lot in one post, but this is an easy one.

This is a mesh "purse" I made for all the birds who are starting to chirp away now that spring is just around the corner. All the goodies in the mesh purse are there to help the birds build their nests. There are many sites out there that will explain the items birds need to build their nest, but I found one link that was helpful. Click here for the link. Scroll down on that page until you reach the Nest Material section.


Here are the items you'll need...
  • wire mesh or chicken wire...found in hardware store or in my father-in-law's garage!
  • 2 pieces of thin wire to "sew" the edges closed
  • wire cutters
  • and all your scrap sewing items...thread, yarn, fabric strips, batting
  • I also added our dog Annie's hair (which they recommend). It all came out of the dryer vent after I washed her cotton blanket. I know dryer lint is not recommended, but this is seriously just all her hair because that's all I washed. Dye free detergent and no dryer sheets were used

The edges of the wire mesh had sharp points...


just snip those off with your wire cutters.


Now they're nice and smooth. Sand if necessary.


You can make your scrap bag in any shape, so the starting measurements can be any thing. This is just a rectangle piece that I had.


First, I folded up the bottom to form the purse.


Next, fold over the top flap, like an envelope.


This is the thin wire I used to "sew" up the side seams.


Start at the bottom corner.


Twist the wire to attach it to the mesh.


Just weave the wire in and out through the mesh and pull tight as you go along.


Here is the whole side sewn up. Repeat on the other side as well to form the "purse".


This is the view from the top with the flap open, looking in with both sides sewn up.


I looked through all my old buttons for a closure.


Wire the button to the front.


and add a ribbon to wrap around the button to keep the pouch closed.


Now fill it up with all your sewing scraps!


Twist the ribbon around the button.


Add another ribbon to hang the pouch from the tree.


I also added a stick and cotton batting which I forget in the original list of materials needed.


I poked the stick through the mesh. It's the perfect perch for the birds to rest on while they are taking out the materials they need to build their nest.


Now it's all set to hang outside for our feathered friends.


Don't forget to add all your beautiful cotton quilting scraps. With all that fabric, you'll have the prettiest bird's nest around!


This area of our yard is always full of bird's nest, so I hope these little bird purses filled with their building materials will help.


The temperature is in the 20's tonight! This post is one more way to...
space
Think Spring, Think Spring, Think Spring!!
space
Dont' forget to join the Sew Darn Crafty Link Party...show off YOUR projects and there's a give away too. Click here to join in on the fun!
space
Have a wonderful Tuesday,
~Karen~

Quilting Ruler That is Heaven Sent...

Ok, I didn't think I lived under a rock, but maybe I do or this ruler is brand new. I'm thinking the rock theory, but that's just me!

I look at quilting rulers every single time I go into a sewing/quilting store...every time! I have a 6 inch wide by 24 inches long quilt ruler. Why it's only 6 inches wide and not 6 1/2 inches when most quilters cut strips or blocks with the extra 1/2 inch seam allowance is beyond me.

Well, look at this...Ahhhhh!!! Can you hear the angels singing?!!


See that measurement on the label...6.5" x 24.5"? Yay!


I hope you can see the color change on this ruler. See that pinkish colored edge on the top and the right? Well, that's the extra 1/2 inch.


The ruler can be flipped over so you can use any of the measurements. The main black lines can be either 1 inch or 1 and 1/2" inch.
space
So, if you are cutting 2 and 1/2 inch strips, you would line up the edge of your fabric on the 2 1/2" darker cutting line. Easier for me to see the darker line than the lighter line in between.


On the other side, it's still the regular 1", 2", 3" on the darker lines.


The markings are on the long side and the short side too, so you can hold the ruler in any direction. I just love the fact that I can cut a 6 and 1/2 inch block with this ruler!


I used a gift card I had at Walmart to buy this. It was in the craft department for $12.97.
space
Don't forget my Linking Party...Sew Darn Crafty. There's a little give away with it this week too.
space
Click HERE to go to that post to join in on the fun and see all the wonderful projects.
space
Have a great Monday
~Karen~

Sunday, March 13, 2011

Sew Darn Crafty Party...and a Give Away!

It's Linking Time!! Sew Darn Crafty is the place where you can show off what you've been up to in the sewing, knitting or crafting department. Show off any project you'd like...Anything! We'd all love to see it!

  • Grab, this button for your post or side bar
  • or link to Sew Many Ways in your post, so all can join in on the fun.
  • link as many projects as you'd like


Here's the GIVE AWAY part...
  • for every link you add to this post, that will be one entry in the give away
  • for another entry, you can comment on this post and tell us what your favorite Hobby is.
  • if you don't want to link a project, but would like to enter, you can just leave a comment on this post and let us know what your favorite Hobby.

Let's see what the most popular Hobby is!

The give away includes...a green theme! I'm trying to bring on spring here!

  • a wooden "Dream" plaque
  • package of 6 scented tea lights
  • a small tin Herb watering can
  • Herb themed napkins
  • 4 pack of mesh tote bags

Linking Party ends Saturday night March 19th. I'll pick the winner Sunday, March 20th!


Good Luck and have fun linking up!!

~Karen~


Thursday, March 10, 2011

My Thoughts on Thursday...

space
Did you know one person can eat a whole package of Caramel Delite Cookies from the Girl Scouts in one sitting?
space
...Don't ask!
space
~Karen~

Monday, March 7, 2011

Tool Time Tuesday...Sewing/Craft Kit To Go

Happy Tuesday all! I was away for most of the weekend at my first quilting retreat. I can't thank Tina enough for inviting me. I had a great time and met so many wonderful people. I'll share a few pictures later this week.

What I do want to share for this week's Tool Time is what I carried all my sewing goodies in to the retreat. I borrowed my daughter Kelsie's travel hanging toiletry organizer. Travel bags come in many different styles, so anything would work great.

Hanging toiletry bags are great for storing all your crafting and sewing needs when you are taking a class, going to a retreat or even just going to a friend's house for a day of sewing, crafting or scrap booking.

The bag just rolls up and is easy to carry.


Once you unroll them, it shows all the pockets and storage places.


The top pocket is wide and deep, so I stored all my thread and the pill box that carries all my small goodies.


Bobbins, needles, tape measure, safety pins and pins.


The next pocket held all my rotary cutting needs and finger pincushion. Click here for pincushion ring tutorial


The next big pocket held all my scissors. I stored them in eye glass cases, so the point wouldn't go through the plastic.


The last big pocket held a lot...extension cords, surge bar and some extra projects.


The best part about using a travel cosmetic/toiletry bag is that they usually have a built in hanger. The hook is for hanging the bag in the bathroom of your hotel, but not for us. This bag hangs perfectly on the back of the chair in your class or retreat.

Always handy, but out of the way to keep your work surface clear.


When you're done, just roll it up, tie it closed and you're ready to go...or should I say ready to "sew"!


It's a great place to store all your things and easy to carry too.


Since I've been gone since Friday, I'll catch up on my emails and comments on Tuesday and Wednesday. I read them all...just takes time to respond to each one!
space
Thank you for all your kind words and thanks for always being here,
~Karen~

Thanks Kelsie for letting me use this...it's all emptied and back where I stole it. I mean borrowed it! LOL

Wisata Danau Toba - Sumatera Utara

Danau Toba adalah salah satu destinasi wisata alam terbesar di Indonesia dan terletak di Sumatera Utara. Ini adalah danau vulkanik terbesar ...