
Welcome to another edition of Blog Buddy...the place to find helpful tips and tricks for your blog. I am not an expert, by any means, but I have learned a lot along the way (especially by making mistakes!)
I've had soooo many emails asking how to add a button to a blog. So today I thought I would show you how to "Grab a Button" from another blog to add to your side bar or to a post. You know I love pictures and they are worth a thousand words, so here are 17 pictures to show you a quick and easy process.
First, find the button you'd like to have on your blog. Some will have "the code" underneath and some will not. Let's start with the code.
Click any picture below to enlarge...
These 2 buttons on my blog, that are circled in the picture, have the code.

Place your cursor at the beginning of the code...left click and drag the high light feature down to the end until the whole code is high lighted.
Right click on the high lighted part and click on COPY.

Now go to your dashboard and click on DESIGN.

Click ADD A GADGET...

Scroll down until you come to the choice that says...HTML/JAVASCRIPT. Click on that.

A second window will pop up.
- The TITLE section is what you want to say above the button...anything you'd like, the blog name etc
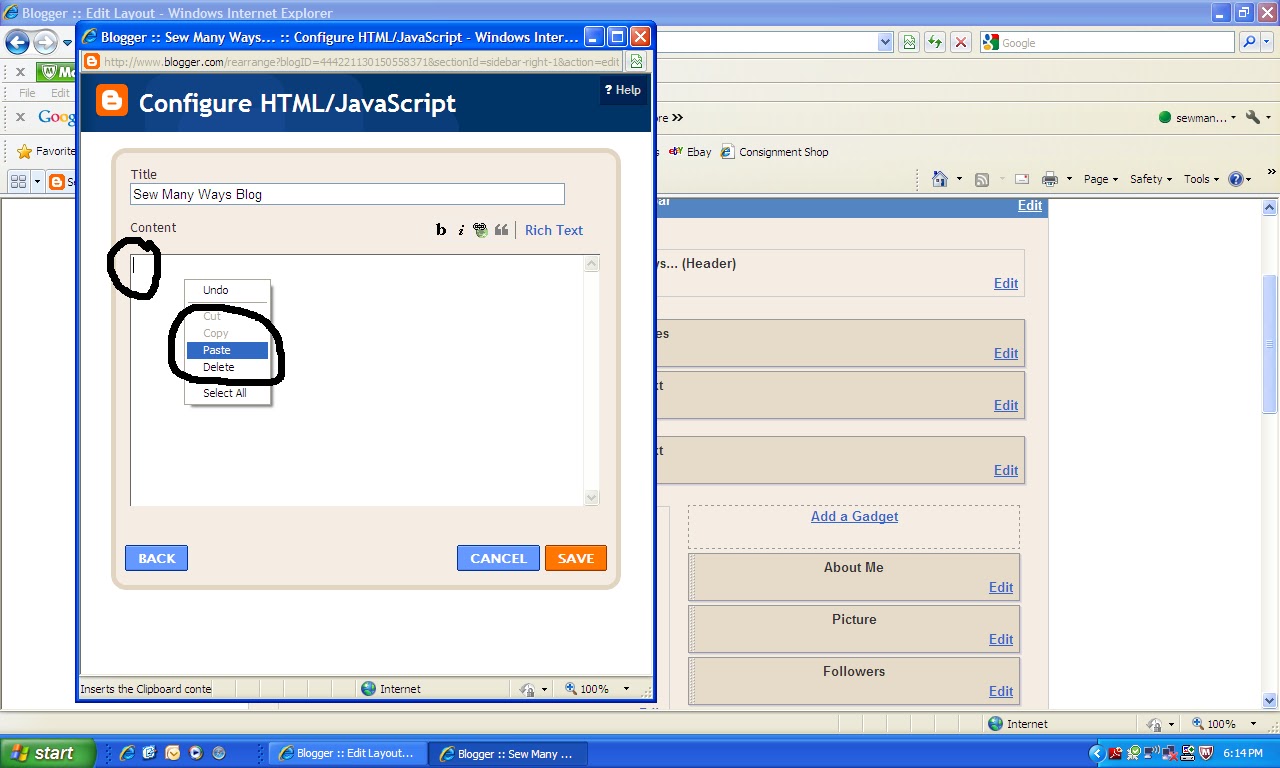
- place your cursor in the top left corner of the big empty box and right click in there and pick PASTE.
- that code you copied before should appear. If the word PASTE isn't there, just go back and copy the code again and come back to this box and try again.
The code will be there, but make sure you click SAVE.

Now any gadget that you add to your blog will appear at the top of your side bar.

To move any gadget, just click on it and DRAG it to where you want.
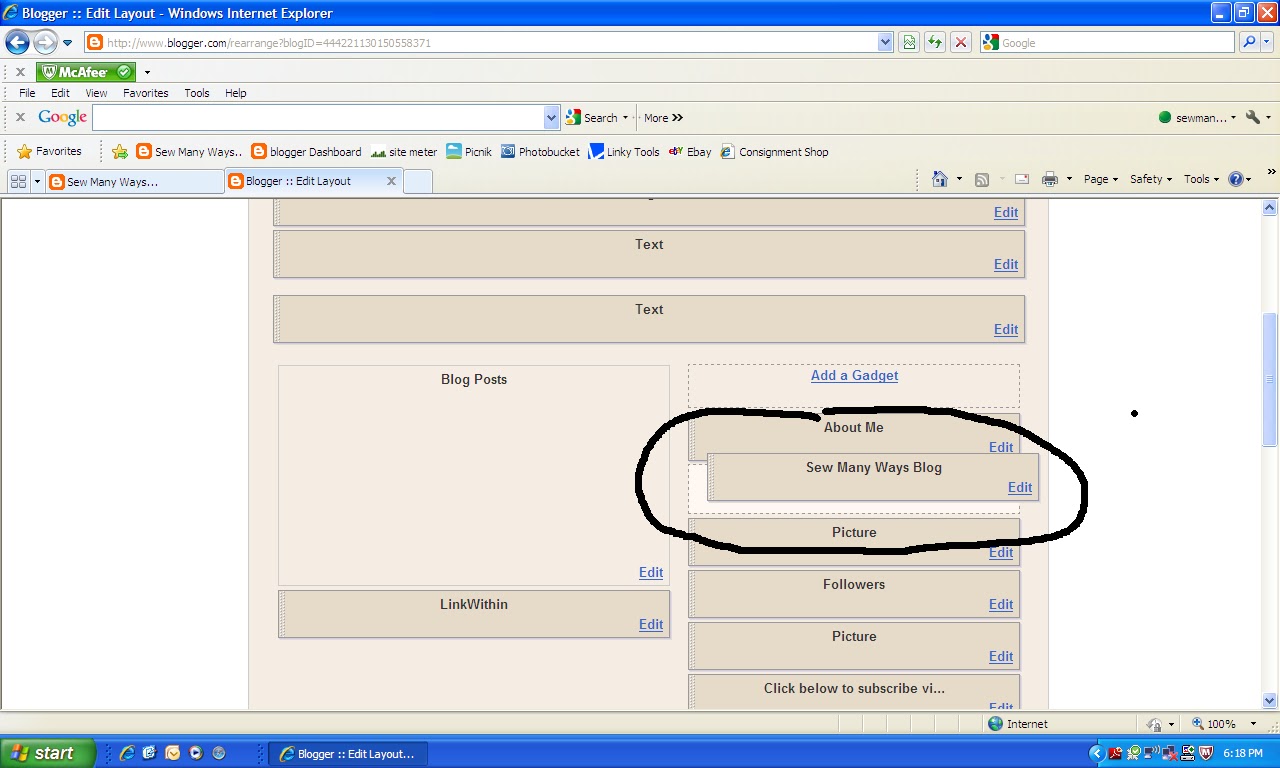
Make sure you click SAVE again after you have moved it into position.
Now you are all set!! A button that has a link back to that blog is now on your side bar. The code is the link back to that blog.

To add a coded button to your written post, just click on the HTML tab above the box you write a post in. You can do it before or after you start writing a post.
Just place the cursor where you want the button to be in the post and right click and PASTE that copied code.
To remove a button from the post, you can just click on it back in the COMPOSE tab and click REMOVE.

Now here is how to add a button if there isn't a code...
- Right click on the button you want
- click on "SAVE PICTURE AS" or what ever your computer says to save
- save it and remember where it is

Now go to the design section and the add a gadget button. Scroll down to PICTURE.

In this window...
- the TITLE is what is above the button or picture...like the blog name
- the CAPTION is what's below...like "great place to find recipes"
- the LINK is the address of the blog the button is from...just copy and paste it in there, but don't have 2 https in there if you copied it. The link address must be in there or the button won't work when you click on it. It will just be a static picture.
- now BROWSE from your computer to go get the picture you saved earlier. Wait for the picture to pop up in that box before you click save
- then click SAVE

Do the same thing to position it where you want. Click...

and drag into place. Don't forget to click SAVE...are you tired of me saying click SAVE !!

You can use that last "Picture" gadget to add any picture...not just a button picture. You can take a picture of one of your favorite posts from your blog and put a link to THAT post with that picture.
Hope you find this one helpful...
Happy Blogging,
~Karen~


No comments:
Post a Comment